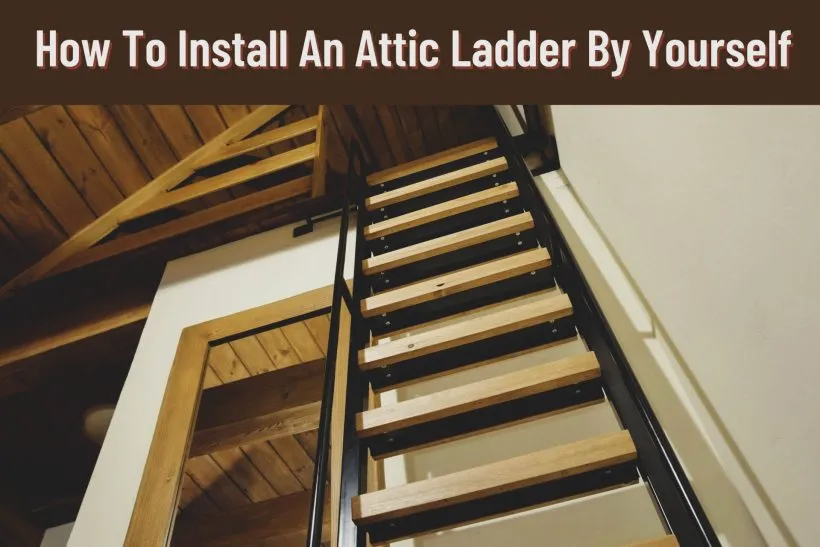
To install an attic ladder yourself, you cut a framed opening between the ceiling joists, drop the folding ladder unit into it, screw it to the framing, and trim the legs to reach the floor. This is a real do-it-yourself job. With the right tools, a free weekend, and a helper for the heavy lift, most confident DIYers can fit or replace a pull-down attic ladder without hiring anyone.
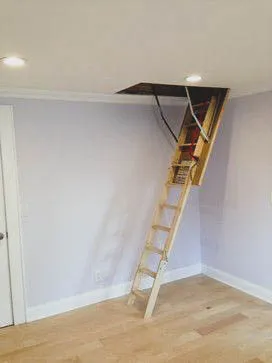 Attic ladders turn dead roof space into real, reachable storage, and they save you from dragging a step ladder out every time you need to get up top. Some homes come with one already fitted; plenty don’t. The good news is you rarely need to call anyone. The project takes care and precision, but the steps are simple once you see them laid out.
Below is the full process, from choosing a spot to trimming the ladder to length, plus the tools, realistic cost and time, and the mistakes worth avoiding.
How to install an attic ladder: step-by-step
Fitting an attic ladder is a big project made of small, exact steps. Follow the measurements closely, wear your safety gear, and don’t rush the framing, that’s the part that holds the whole thing up. Here’s everything you need before you start, then the eleven steps.
Tools
You won’t reach for all of these on every install, but a reciprocating saw, a drill, a spirit level, and a good tape measure do most of the real work:
- Circular saw
- Drill
- Hacksaw
- Hammer
- Ladder (a step ladder to work from)
- Nail gun
- Packers
- Pencil
- Plasterboard saw
- Reciprocating saw
- Hand saw
- Saw horses
- Set square
- Spirit level
- Tape measure

Materials
The parts list is short. Buy the ladder unit first. Its frame size decides the opening you cut.
- Attic ladder kit (sized to your ceiling height)
- Framing timber for the headers
- Screws and framing nails
- Architrave (trim) to finish the hatch
Instructions
Here are the eleven steps, in order. If you’re replacing an existing ladder in a hatch that’s already cut, you can skip straight to Step 3.
Step 1: Choose a location
Skip this step if you already have an access hatch and you’re just reinstalling. Otherwise, pick a spot with enough clear floor below for the ladder to swing down and enough headroom above to climb through comfortably. A hallway or landing ceiling usually works better than a cramped closet, and a central spot beats a corner where the ladder would foot against a wall.
Measure the ladder’s extended reach and mark that arc on the floor to be sure a door, light fixture, or furniture won’t block it. Check the attic side too: you want to land between the rafters with room to stand, not under a low collar tie or right against the roof slope where you’d be stooped over every time you climbed up.
Step 2: Measure
Measuring is the foundation of the whole job. Get it wrong and nothing else lines up. First, check the size of the opening your ladder frame needs, then confirm the ceiling-to-floor height so the ladder is tall enough.
The average rough opening for a pull-down ladder is roughly 22.5 by 54 inches, but always cut to the size printed on your kit’s instructions.
Measure the floor-to-ceiling drop as well. That distance tells you which ladder length to buy and how much you’ll trim off the legs at the end.

Step 3: Choose the right ladder
The ladder itself is the part that matters most, so choose on three things: length (it must reach your ceiling height), material, and weight rating. Wooden ladders are sturdy and quiet; aluminum ones are lighter and won’t warp. Whichever you pick, check the maximum load rating on the label and make sure it comfortably clears your body weight plus whatever you’ll carry up. A wobbly or under-rated ladder is not worth the saving.
Step 4: Prepare the area
Before any cutting, make sure the spot is genuinely clear. Get into the attic and check for cables, pipes, ducts, or bracing running through the space you marked. Most important, confirm you won’t be cutting or weakening a load-bearing joist. If a structural joist runs straight through your opening, move the location, don’t cut it.
Step 5: Cut the hole
Mark the position and the exact dimensions on the ceiling first, using chalk or a bright pencil so the lines are easy to follow. Measure the mounting frame, decide where it sits, then transfer that outline to the ceiling. Cut the opening neatly with a hand saw or plasterboard saw, staying just inside your lines. Cutting from below drops a lot of dust and debris, so wear eye protection and a mask.
Step 6: Frame the opening
This is the step people get wrong, so follow it precisely:
- Measure the perpendicular distance between the ceiling joists at the cut opening.
- Cut two boards to that length to act as headers.
- Position a header at each end of the opening, square (90 degrees) to the joists.
- Nail each header to the joists with at least three nails per joint.
The headers box in the opening and carry the ladder’s weight. Don’t skimp on the fixings here.
Step 7: Install the ladder
You need two people for this step, one in the attic and one below. Read the manufacturer’s instructions before you start, and don’t unpack or release the folding sections until they tell you to.

- Attach two temporary support boards across the headers to hold the unit while you work.
- Lift the ladder up through the opening and rest its frame on the support boards.
- Slide it into the hatch and center it in the opening.
- Secure the hinge side first.
- Screw the frame to the back header board with at least two screws.
Step 8: Check the attic door
Before you go further, make sure the hatch door swings open and shut freely with no rubbing or binding, and do this without releasing the ladder’s string yet. If the door catches, adjust the fit now while it’s easy to reach.
Step 9: Secure the ladder
Fix the hinge side firmly to the back header board. The manufacturer’s instructions will point out the remaining fixing points, work through all of them so the unit is permanently and squarely fastened, not just tacked in place.
Step 10: Adjust the ladder length
Now untie the strings and unfold the ladder fully. Measure from the bottom section down to the floor, mark the excess, and trim the legs to length with a hacksaw so the feet sit flat. Go slow here. Cut a little at a time and re-check. You can always take more off, but you can’t add it back.
Step 11: Attach the architrave
Cut the trim timber to match the hatch dimensions and nail the architrave around the opening for a clean, finished edge. A coat of paint over the trim and hatch blends it into the ceiling and hides the joins.
Cost, time, and difficulty
For a straightforward install into an existing or easy new location, most DIYers should budget a weekend, and often just an afternoon or two once the opening is cut. Replacing a ladder in a hatch that’s already framed is the quick end; cutting a brand-new opening, patching drywall, and finishing trim is what stretches the job across a weekend.
The ladder kit itself is usually the biggest single cost, and price tracks the type you choose:
- Basic aluminum pull-down: the cheapest option, light to handle and rust-free, fine for occasional storage access.
- Wooden pull-down: a step up in price, sturdier underfoot and quieter, the common choice for regular use.
- Insulated or fire-rated: the priciest, but worth it if the attic is conditioned space or code calls for a fire separation, since they cut the draft and heat loss through the hatch.
Beyond the kit, budget a little for framing timber, screws, trim, and a tub of joint compound if you’re cutting new drywall. Those extras add time more than money.
On difficulty, this is a mid-level job. It’s comfortable for anyone who can measure accurately and use a saw and drill, but not a first-ever project. Consider hiring a carpenter for the framing if any of these apply: your opening lands on a load-bearing joist, you’re not sure what runs above the ceiling, the span between joists needs doubling up, or you’d be working solo. Even then you can hand the finish trim and paint back to yourself and save on labor.
Safety and precautions
No home-improvement job is risk-free, and an attic ladder carries real weight over your head, so take the precautions seriously:
- Get the location right. Never cut into pipes, cables, ducts, or a load-bearing joist. Check above the ceiling before the saw comes out.
- Measure twice, cut once. A wrong measurement throws off the whole install and can mean re-cutting, extra materials, or a ladder that doesn’t sit square.
- Wear protective gear. Dust and insulation fall straight into your face when you cut from below. Use safety glasses, a dust mask, and gloves.
- Don’t work the heavy steps alone. Lifting and holding the unit is a two-person job; trying it solo is how ladders get dropped and fingers get pinched.
- Respect the weight rating. Only load the ladder to its rated limit, and re-check the fixings after the first few uses.
- Mind the tools overhead. Cutting drywall and joists above your head is awkward; keep a firm footing on your step ladder, never overreach, and let the saw do the work rather than forcing it.
- Test before you trust it. Once everything is screwed home, put weight on the bottom rungs gradually before climbing the full ladder, and watch for any flex or movement in the frame.
If anything feels loose, springy, or off-square after the install, stop and recheck the framing and fixings before you use it. An attic ladder is only as safe as the headers holding it up.
Frequently asked questions
Can I install an attic ladder by myself?
Yes, the framing, cutting, and finishing are all DIY-friendly. The one step that genuinely needs a second person is lifting and holding the ladder unit into the opening, so line up a helper for that part.
What size opening does an attic ladder need?
The rough opening for a standard pull-down ladder is around 22.5 by 54 inches, but sizes vary by model. Always cut to the exact dimensions on your kit’s instructions rather than a generic figure.
How long does it take to install an attic ladder?
Replacing a ladder in an existing hatch can take a couple of hours. Cutting and framing a brand-new opening, then trimming and finishing, is more realistically a weekend project.
Do I need a permit to install an attic ladder?
It depends on where you live. Swapping a ladder into an existing opening usually doesn’t, but cutting a new structural opening may, so check your local building code before you start.
Can I put an attic ladder in my garage?
Yes, a garage ceiling is a common spot as long as there’s clear floor for the ladder to swing down and no structural joist or services in the way of the opening.
How much weight can an attic ladder hold?
It depends entirely on the model. Basic pull-down ladders carry less than heavy-duty ones, so check the load rating printed on the label before you buy and make sure it clears your weight plus whatever you’ll carry up. Never load a ladder past its rated limit, and re-check the fixings if it starts to feel loose.
Final thoughts
Installing an attic ladder comes down to careful measuring, solid framing, and a steady, two-person lift, and none of it is beyond a confident DIYer with a free weekend. Take your time on the location and the headers, respect the safety basics, and you’ll turn that awkward roof space into storage you’ll actually use. If you’d rather build a simple loft access from scratch, our guide on how to build a loft ladder walks through that route, and if you’re still sizing things up, see what size ladder you need for a two-story house.
Thank you for reading!