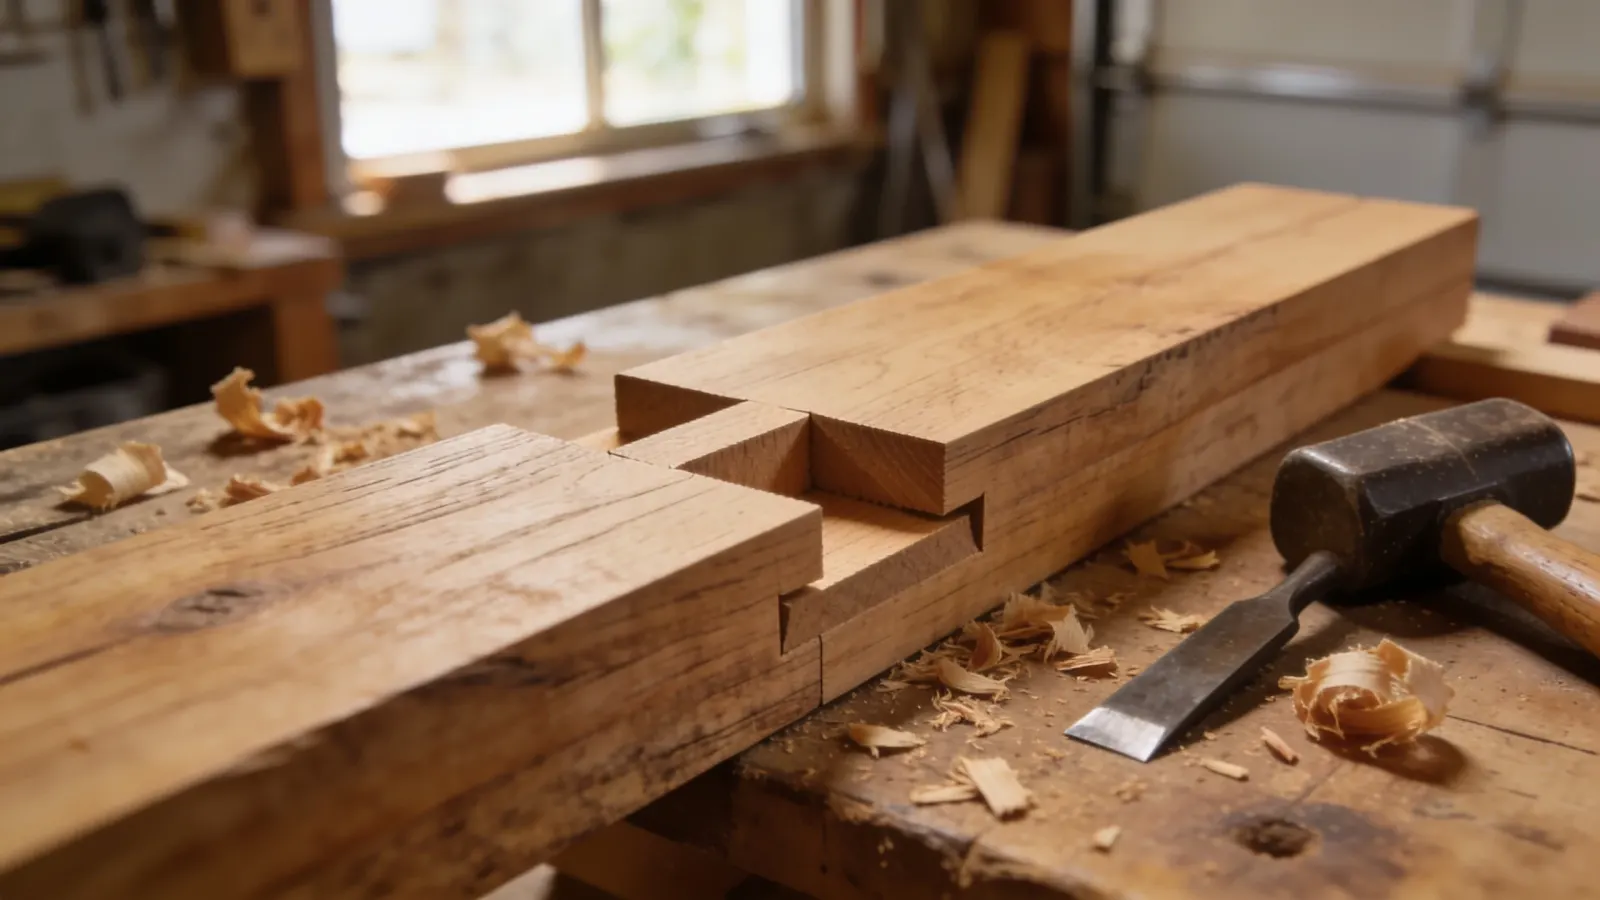
Wood joints fall into a few functional families. Basic edge and end joints like the butt and miter form the starting point. Grooved joints like the dado and rabbet add mechanical strength. Interlocking joints like the dovetail and mortise-and-tenon resist pulling apart and carry real furniture-frame loads. Hardware-assisted options like pocket holes and dowels offer speed. The right pick comes down to four things, and weighing them before you cut saves rework: how much load the joint carries, whether you care about seeing end grain, what tools you own, and how much patience you have. A butt joint with glue alone won’t hold a table leg. It’s perfectly fine for a shop jig. A dovetail strongly resists being pulled apart. You don’t need one to hang a picture frame. I’ve spent thirty-plus years building furniture and fixing up houses, and execution decides more than the joint you pick.
How Wood Joints Work
Before you cut anything, understand what a joint actually does. It transfers load from one board to another across a glue surface. That surface only works if the wood fibers line up properly.
Grain direction matters more than most beginners realize. Glue bonds well to long-grain surfaces, meaning the sides of a board, because the fibers absorb adhesive deeply. End grain, the cut ends you see on a board’s terminus, acts like a bundle of drinking straws. It drinks up glue and still forms a weak bond, because you’re essentially gluing straws together sideways.
Wood movement is the other factor I see DIYers ignore. Wood expands and contracts across the grain with humidity changes. Along the grain it stays relatively stable. A wide solid-wood tabletop can shift by several millimeters seasonally. If you lock that panel rigidly on all sides with fixed joints, something cracks. Breadboard ends, sliding dovetails, and mortise-and-tenon joints with a haunch solve this. They let the panel breathe while keeping it flat.
Butt Joint
The butt joint is the simplest joint in woodworking, and the weakest. You square up two board ends and butt them together, then add glue, screws, nails, or a combination. That’s it.
I use butt joints constantly for shop projects, shelving that isn’t heavily loaded, and any place where the joint won’t be stressed. The problem is the glue surface. When you butt two boards together, you’re often gluing end grain to long grain or end grain to end grain. Both are weak bonds. The joint relies entirely on your fasteners for strength.
If you need a butt joint to carry real load, reinforce it. Add a gusset, a cleat underneath, or drive screws at an angle. Never rely on a plain butt joint alone where a chair leg meets the seat, where a shelf carries books, or anywhere a person’s weight or a stack of belongings will eventually test the glue line. It will fail, usually at the worst possible moment.
Miter Joint
A miter joint cuts two pieces at complementary angles, most commonly 45 degrees each, to form a 90-degree corner with no exposed end grain. Picture frames and trim molding use miters because the corner looks clean from every angle.
Left unreinforced, a miter joint is actually weaker than a butt joint. The glue surface is end grain on both pieces, which bonds poorly. Professional framers reinforce miters with biscuits, splines, or keys for this reason. A spline is a thin piece of wood or plywood set into a slot cut across the joint, locking the two miters together.
For picture frames, I cut miters slightly long and sneak up on the fit. A gap on the outside of a miter is visible from across the room. A gap on the inside hides better. If you’re trimming out a door or window, invest in a quality miter saw and a good blade. Cheap blades tear the wood and leave fuzzy edges that won’t glue well. My DeWalt sliding compound miter saw has earned its spot in my shop for exactly this kind of work.
Lap Joint
A half-lap joint removes half the thickness from each board so the two pieces overlap flush. You end up with a joint that’s the same thickness as a single board, with a much larger glue surface than a butt joint.
Cross-laps join two boards at right angles. Think of a simple table base or a shelf support frame. Full-laps join boards running in the same direction, like splicing two pieces of trim end to end. Both are workhorses in framing and cabinetry.
I like half-laps for face frames and simple table bases because they’re forgiving. You can cut them on a table saw, with a router, or even by hand with a chisel and a marking gauge. Cutting the shoulders square is what makes or breaks the joint. A slightly loose lap joint can be clamped tight. A skewed one will rack the whole assembly. My old Stanley marking gauge still gets daily use for laying out these cuts.
Dado and Groove Joints
A dado is a channel cut across the wood grain. A groove runs with the grain, and my guide to cutting a groove with hand tools covers the hand-tool method in detail. Both accept the edge of another board, creating a strong, self-locating joint.
Dadoes are everywhere in cabinet construction. Shelf standards, drawer dividers, and carcase joinery all use them. A shelf seated in a dado carries far more weight than one held by screws into the side panel. The shelf’s edge transfers load directly into the surrounding wood.
One rule I follow closely: don’t cut a dado deeper than about one-third of the stock’s thickness. That’s a shop rule of thumb rather than a code requirement, and it’s served me well. Cut deeper and you weaken the board at the joint. That’s the very spot that needs strength. A 3/4-inch shelf board gets roughly a 1/4-inch dado.
You can cut dadoes with a table saw and a dado stack, a router with a straight bit, or basic carpentry tools like a hand saw and chisels. For cabinet-grade work, a router with a guide bushing and a straightedge gives you the cleanest, most consistent results. My Freud dado stack has cut thousands of feet of shelving dadoes without complaint.
Rabbet Joint
A rabbet is an L-shaped recess cut into the edge or end of a board. The mating board sits into that recess, creating a joint with moderate strength. It has more glue surface than a butt joint, but less surrounding wood to resist prying open than a dado.
Rabbets show up in cabinet backs, drawer bottoms, and picture frame rebates. Anywhere you need a panel to sit into a frame, a rabbet does the job. The rabbet gives you more glue surface than a plain butt joint and helps align the pieces during assembly.
The weakness of a rabbet comes from the surrounding wood. A dado has wood on both sides of the channel resisting the joint prying open. A rabbet only has wood on one side, so it can tear out under heavy load. For cabinet backs and drawer bottoms that’s rarely an issue. The panel is captured on all four sides anyway.
If you’re building cabinet carcasses, see my rabbet joint guide, which walks through the router setup and the common mistakes.
Tongue and Groove Joint
A tongue-and-groove joint mills a protruding tongue on one board edge and a matching groove on the other. The boards slide together, locked flat and aligned.
This is the standard for hardwood flooring and tongue-and-groove paneling, and for good reason. The interlocking edge keeps boards aligned under foot traffic and seasonal movement. Each board supports its neighbor, spreading the load across the entire floor and keeping individual boards from flexing on their own.
Manufacturer installation instructions vary by product, so I always follow the specific flooring or paneling maker’s guidance for glue, nailing, and fastener placement. On paneling and ceiling boards, a common approach nails through the tongue so the next board covers the nail head, leaving a clean face. That’s why tongue-and-groove wainscoting looks seamless. No visible fasteners.
Wood movement across the floor needs planning. Solid hardwood flooring expands and contracts across the grain with humidity, the same cross-grain movement that can shift a wide tabletop by several millimeters seasonally. Leave the manufacturer’s recommended expansion gap at the walls, or the floor can buckle. I learned this lesson the hard way on a house built in the 1960s where the previous owner had skipped the gap entirely.
Mortise and Tenon Joint
The mortise and tenon is the backbone of traditional furniture making. A tenon, a projecting tongue cut on the end of one board, fits into a mortise. That’s a matching rectangular hole cut into the other board. Glued and clamped, it’s widely regarded as one of the strongest traditional joints you can make.
Table legs, chair frames, bed rails, and door frames all rely on mortise and tenon joinery because the joint resists both pulling apart and racking. The tenon has long-grain glue surfaces on four sides, giving you an enormous bonding area compared to a butt or miter.
Cutting a mortise and tenon takes practice. I cut the mortise first with a router and a spiral bit, then fit the tenon to it with a table saw and chisel work. The fit should be snug. You should need moderate hand pressure to push the tenon home. It shouldn’t be so tight that you have to hammer it. A too-tight joint can split the mortise wall when the glue swells the wood. My Festool router has made this work far more predictable than it was back in the 1990s with my old Craftsman.
For a detailed walkthrough of cutting and fitting this joint, see my mortise and tenon guide.
Dovetail Joint
The dovetail is the joint people picture when they think of fine woodworking. Interlocking pins and tails fan out like a bird’s tail, mechanically locking the two boards together. Once assembled, the joint strongly resists being pulled apart along the grain. The pins physically block the tails.
Through dovetails show the joint on both faces. That’s why you see them on high-end drawer boxes and heirloom chests. Half-blind dovetails hide the joint on one face. They’re the standard for drawer fronts, where you don’t want end grain showing on the front. Sliding dovetails run a single dovetailed tongue into a matching socket, used for shelf supports and drawer dividers.
Cutting dovetails by hand is a skill that takes years to master. I spent many evenings practicing with a dovetail saw and chisels before my joints looked presentable. A router with a dovetail jig cuts consistent, tight-fitting pins and tails in a fraction of the time, though the jigs are expensive. My Leigh jig has paid for itself many times over on production drawer work.
The strength of a dovetail is why it’s the standard for drawer boxes. A drawer gets pulled open thousands of times, and the front joint takes constant tension. A dovetail shrugs that off. A butt joint with nails will eventually work loose.
Box Joint / Finger Joint
A box joint, also called a finger joint, cuts interlocking rectangular fingers at right angles. It looks like a dovetail from a distance. The fingers stay straight; dovetail pins and tails angle outward.
You can cut box joints on a table saw with a dado stack and a simple jig. That makes them far faster to produce than dovetails. The jig indexes each cut off the previous one, so once you set it up, you can cut a drawer’s worth of corners in minutes.
Box joints are common for boxes, drawers, and shop storage where you want the mechanical strength of interlocking fingers on a production timeline. The straight fingers give up a little pull-apart resistance next to angled dovetails, and for most shop applications that small gap never matters in practice.
If you’re building shop drawers or simple boxes, I’d start with box joints before tackling dovetails. The setup is simpler, the results are consistent, and you’ll learn the indexing skills that transfer to more advanced joinery.
Dowel and Biscuit Joints
Dowel joints and biscuit joints are reinforcement methods that strengthen otherwise weak connections. Both are faster than cutting interlocking joints, and both have their place.
A dowel joint drills matching holes in both boards and inserts glued wooden dowels. The dowels add long-grain glue surface and mechanical strength to what would otherwise be a butt joint. Doweling jigs align the holes, and the results can be surprisingly strong; a decent jig belongs on any shortlist of the best tools for woodworking.
Matthias Wandel, a woodworker and engineer, ran an informal load-to-failure test on red oak comparing dowel joints to mortise and tenon. His sample was small, four dowel joints and two mortise and tenon joints. The results came out close enough that he concluded he couldn’t call a statistically significant winner. I’d read that as both joints being strong when done well, a case for practicing your technique rather than agonizing over which method to pick.
Biscuit joints use a football-shaped compressed wood wafer. You cut matching curved slots in both boards, glue the biscuit into one slot, then clamp the joint together. The biscuit swells from the glue moisture, tightening the joint. My Porter-Cable biscuit joiner has cut thousands of slots over the years without missing a beat.
Biscuits excel at edge-to-edge glue-ups. Joining boards to make a tabletop or panel works perfectly because they align the faces. They’re less useful for structural joints. A biscuit is thin and the glue surface is modest, so I don’t rely on them for load-bearing connections.
Pocket-Hole Joint
Pocket-hole joinery drives screws through a pilot hole bored at roughly a 15-degree angle into the mating board. The screw pulls the two boards together tightly, creating a strong joint with minimal setup.
A pocket-hole jig clamps to the board and guides the drill bit at the correct angle. You drill the pocket, switch to the included driver bit, and drive the screw. It takes about thirty seconds per joint once you’ve done a few.
Pocket holes are my go-to for face frames, cabinet carcasses, and any joint that will be hidden. The angled screw hole is visible on one face, so you need to plan where the pockets go. For furniture where both faces show, pocket holes aren’t ideal. Use a different joint or accept the visible holes. My Kreg jig lives on my workbench for exactly this reason.
The strength of a pocket-hole joint comes mainly from the screw itself. The threads bite into the mating board and pull the joint tight. It won’t match a cut mortise and tenon for a structural frame in my shop’s experience, but pocket-hole joinery is dramatically faster and perfectly adequate for most cabinet work.
Which Wood Joint Should You Use?
This table is the one I wish someone had handed me when I started woodworking.
| Joint | Relative Strength | Skill Level | Tools Needed | Best For |
|---|---|---|---|---|
| Butt | Weakest | Beginner | Saw, glue, clamps | Shop jigs, non-load-bearing |
| Miter | Weak (needs reinforcement) | Beginner–Intermediate | Miter saw | Picture frames, trim |
| Half-lap | Moderate | Beginner–Intermediate | Table saw or router | Face frames, simple bases |
| Dado/Groove | Strong | Intermediate | Table saw or router | Shelves, cabinet carcasses |
| Rabbet | Moderate | Beginner–Intermediate | Router or table saw | Cabinet backs, drawer bottoms |
| Tongue & Groove | Strong | Intermediate | Router or shaper | Flooring, paneling |
| Mortise & Tenon | Among the strongest traditional | Advanced | Router, chisels | Table legs, chair frames |
| Dovetail | Very strong | Advanced | Hand tools or router jig | Drawer boxes, fine cabinetry |
| Box/Finger | Strong | Intermediate | Table saw + jig | Boxes, shop drawers |
| Dowel | Moderate–Strong | Intermediate | Drill + doweling jig | Edge joints, reinforcement |
| Biscuit | Moderate | Beginner–Intermediate | Biscuit joiner | Panel alignment |
| Pocket-hole | Strong (screw-based) | Beginner | Pocket-hole jig | Face frames, hidden joints |
My general rule: use the simplest joint that will carry the load. A dado for shelves, a mortise and tenon for anything structural, a dovetail for drawers you’ll pull open for decades, and a pocket hole for anything hidden that needs to go together fast.
Mistakes to Avoid
After three decades of woodworking, I’ve made every mistake on this list at least once. Skip these and you’ll save yourself the frustration.
Skipping glue-surface prep. Freshly machined wood glues well. Wood that’s been sitting around collecting dust and oxidation doesn’t. A quick pass with 120-grit sandpaper or a sharp plane before gluing makes a real difference in joint strength. I see beginners assemble joints straight off the saw and wonder why they fail.
Cutting dadoes too deep. I already mentioned the one-third rule, but it bears repeating. A dado that’s too deep weakens the board at the joint. If your shelf is 3/4-inch stock, keep the dado at 1/4 inch or less.
Ignoring wood movement on wide panels. This is the mistake that cracks tabletops and splits breadboard ends. A wide solid-wood panel moves across the grain seasonally. If you glue it rigidly into a frame on all sides, something gives. Design for movement or use plywood.
Using a butt joint where load demands better joinery. A butt joint with glue alone is fine for a shop jig. It’s not fine for a chair, a table leg, or a bookshelf. If the joint will carry weight or repeated stress, spend the extra twenty minutes on a stronger joint.
Start with a basic list of the tools you need for woodworking, then master the butt joint with reinforcement, the dado, and the pocket hole first. Those three cover most early projects. When you’re ready to level up, tackle the mortise and tenon. The skills involved, accurate marking, clean chisel work, and fitting parts precisely, carry over to everything else you’ll build. A joint that fails is never the wood’s fault. It’s the design, the fit, or the glue surface, so figure out which one you got wrong, fix it, and move on.
FAQ
What is the strongest wood joint?
Mortise and tenon is widely regarded as one of the strongest traditional wood joints, which is why it’s used for table legs and chair frames. Dovetails are comparable for resisting pull-apart forces, which is why they’re standard for drawer boxes. In practice, a well-fit mortise and tenon with a snug tenon and full glue coverage is built to last for decades of normal use.
What is the easiest wood joint for beginners?
The butt joint is the easiest. You just square up two boards and fasten them together. For something that will actually hold up, I’d start with pocket-hole joinery. The jig does the alignment work for you, and you get a strong, reliable joint in about thirty seconds per connection.
What is the difference between a dado and a groove?
A dado is cut across the wood grain, while a groove is cut with the grain. Functionally they’re the same. Both create a channel that accepts the edge of another board. The orientation mostly matters for how you cut them and where they show up. Dadoes serve shelves running across a case side, while grooves serve panels running with the length of a frame member.
What is the best joint for drawers?
Dovetails are the traditional answer, and for good reason. The interlocking pins and tails resist the constant pull of opening and closing. If you don’t have the skill or equipment for dovetails, box joints are a solid alternative that you can cut on a table saw. For shop-grade drawers that won’t be seen, pocket holes work fine.
Should I use glue, fasteners, or both?
Both, in most cases. Glue provides the primary bond, and fasteners hold the joint tight while the glue cures and add mechanical strength afterward. The exception is joints designed to come apart. A table with removable legs would use fasteners alone. For permanent joints, glue plus the right fastener for the application is almost always the right call.
Thank you for reading!