In the world of woodworking, the art of crafting a perfect rabbet joint is both a skill and a science. Did you know that over 60% of woodworkers believe that mastering hand tools is essential for creating precise joints? If you’ve ever wondered, “How can I Explain How You Would Use Hand Tools When Cutting A Rabbet For A Rabbet Joint?”, you’re in the right place. This comprehensive guide will delve deep into the techniques, tools, and tricks that make the process seamless.
What is a Rabbet Joint?
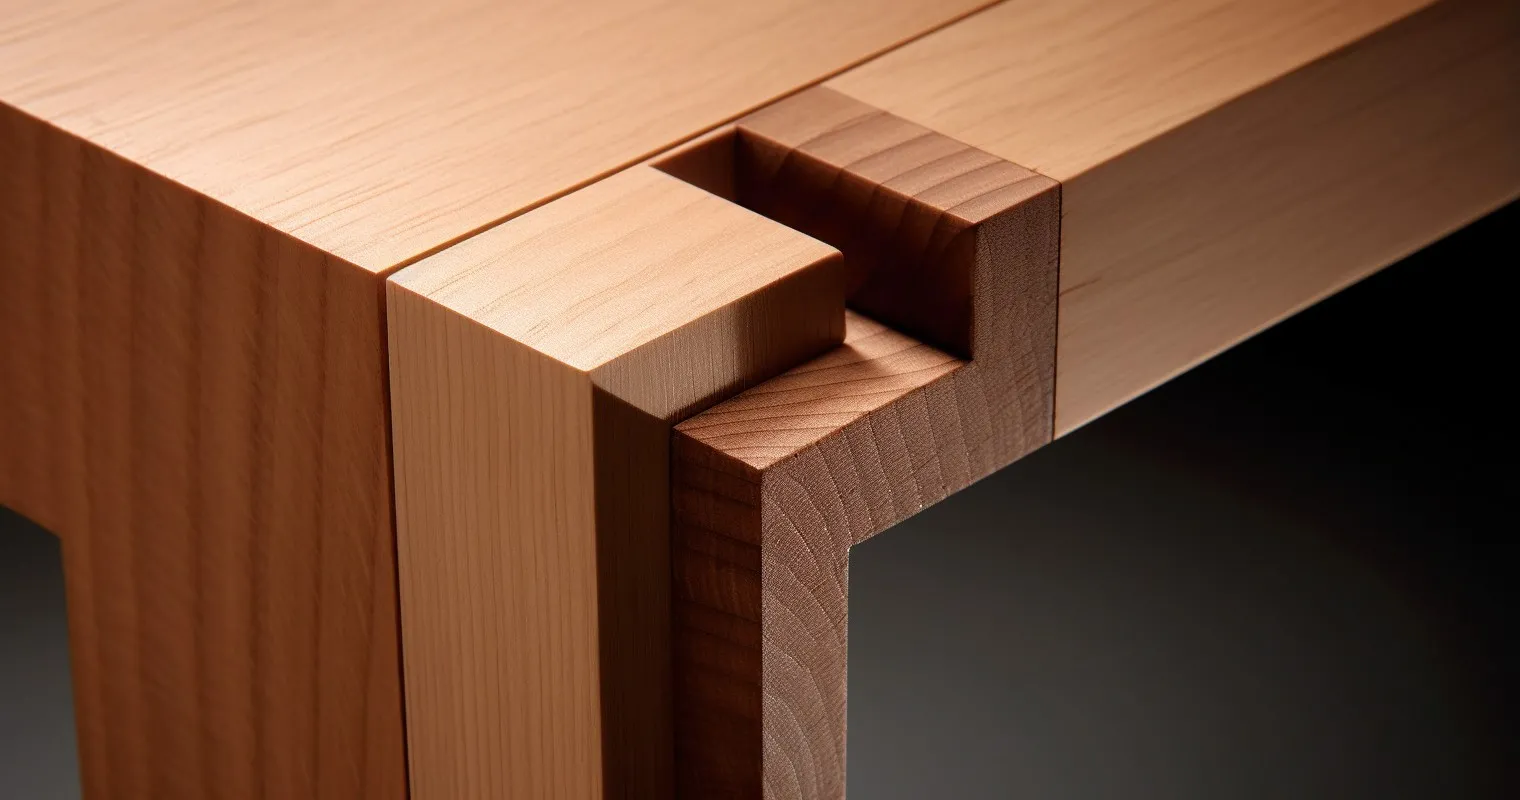
Ah, the rabbet joint! Not to be confused with our furry friends, the rabbits. A rabbet joint is a recess or groove cut into the edge of a piece of wood. Typically, this allows another piece to fit snugly within it, creating a seamless joint.
Historically, rabbet joints have been the backbone of woodworking, dating back to ancient civilizations. Did you know that artifacts from ancient Egypt showcase the use of rabbet joints in their intricate furniture designs? Fast forward to today, and these joints are commonly found in modern carpentry, from window frames to bookshelves.
Why Use Hand Tools for Rabbet Joints?
Now, you might wonder, “Why go old school with hand tools when there are power tools available?” Well, let’s dive into that.
Firstly, hand tools offer an unparalleled level of precision and control. When you Explain How You Would Use Hand Tools When Cutting A rabbit for A rabbit joint, you’re in the driver’s seat, feeling every groove and ensuring the perfect depth and width.
There’s also an undeniable satisfaction in manual craftsmanship. It’s like baking your bread versus buying it. The smell, the texture, the taste – it’s all better when it’s homemade. Similarly, crafting a rabbet joint with your hands gives a sense of accomplishment that’s hard to beat.
Lastly, for all the hobbyists and DIY enthusiasts out there, hand tools are a cost-effective solution. No need to break the bank on expensive machinery when a chisel and some elbow grease will do the trick!
Essential Hand Tools for Cutting a Rabbet
| Hand Tool | Description |
|---|---|
| Marking Gauge | A tool for precision, used to define the exact dimensions of your rabbet. It acts as a blueprint before the construction begins. |
| Chisels | Come in various shapes and sizes, each tailored for specific tasks. For rabbet joints, a sharp, well-maintained chisel can make the initial cuts, defining the joint’s boundaries. |
| Shoulder Plane | Used after the initial cuts to refine the rabbet, ensuring a smooth and even surface. It’s like the polish after a manicure, giving that final touch of perfection. |
So, what are the MVPs (Most Valuable Players) in the world of hand tools for rabbet joints?
For those looking to expand their toolkit, check out The Basics on Pliers – Hand Tools DIY. And if you’re curious about other methods to craft a rabbet joint, here’s a fantastic guide on 6 Ways to Cut a Rabbet.
Preparing the Wood and Workspace
Before diving into the nitty-gritty of rabbet joints, let’s set the stage.
Selecting the right type of wood is paramount. Softwoods like pine or cedar are generally easier to work with, especially for beginners. However, if you’re looking for durability, hardwoods like oak or maple are your best bet.
Once you’ve chosen your wood, it’s time to mark it for the rabbet cut. Precision is key here. A marking gauge or a simple pencil and ruler can be your best friends. Remember, measure twice, and cut once!
Lastly, ensure a safe and clutter-free workspace. A tidy workspace isn’t just for Instagram photos; it’s crucial for safety. Keep your tools organized and always wear safety gear.
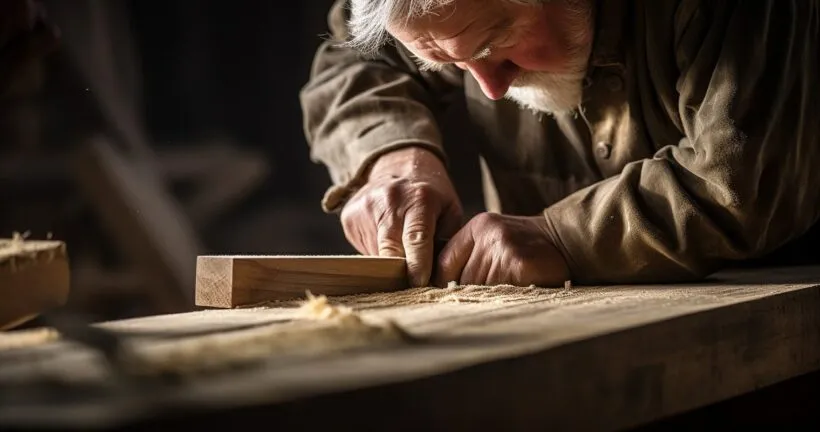
Explain How You Would Use Hand Tools When Cutting A Rabbet For A Rabbet Joint
Alright, let’s get to the heart of the matter. To Explain How You Would Use Hand Tools When Cutting A Rabbet For A Rabbet Joint, follow these steps:
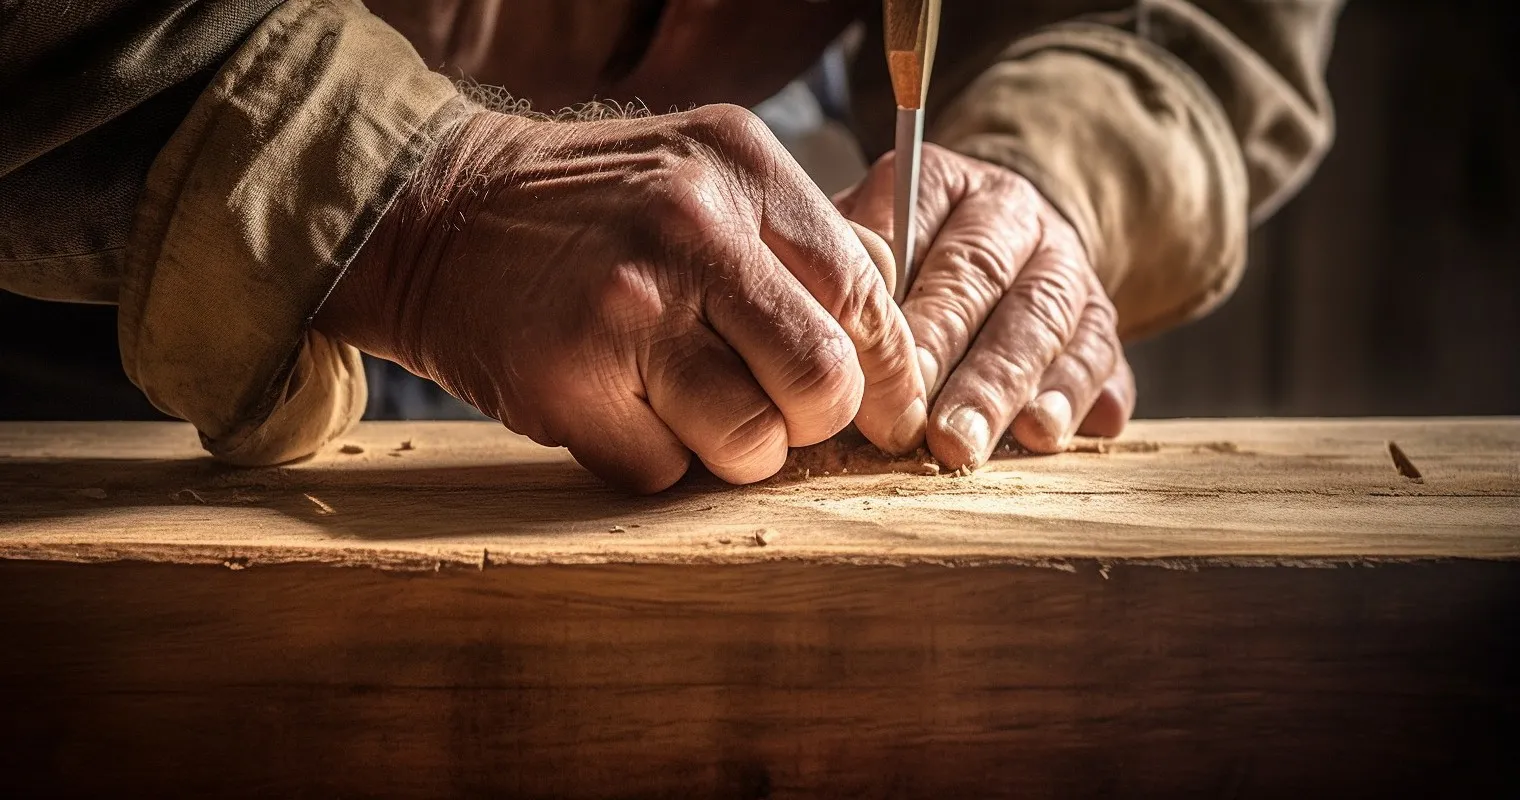
Start with the marking gauge. This tool will help you define the boundaries of your rabbet. It’s like drawing the lines on a coloring book page; it guides your hand tools.
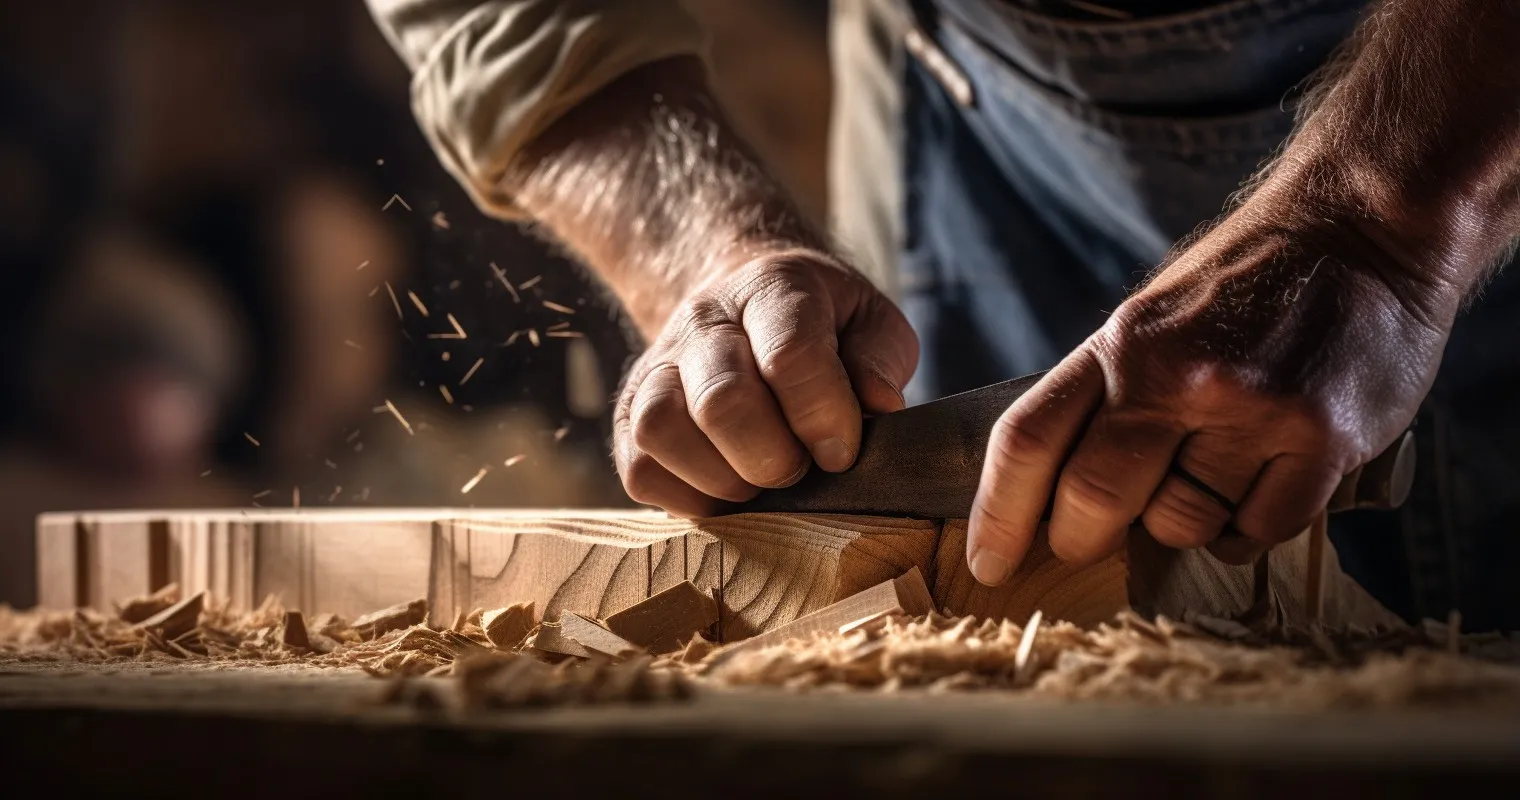
Next, use the chisel for initial cuts. With a firm grip and steady hand, make your initial incisions. Remember, it’s easier to remove more wood later than to add it back!
Once the basic shape is carved out, refine the rabbet with a shoulder plane. This tool ensures a smooth, even surface, making your rabbet joint fit like a glove.
A pro tip? Always ensure a smooth and even rabbet by frequently checking your work. A carpenter’s square can be invaluable here.
For more insights on using hand tools effectively, check out How to Use a Level Correctly – Hand Tools DIY. For a deeper dive into rabbet joints, Three Ways to Cut a Rabbet Joint is a fantastic resource.
Troubleshooting Common Issues
Even the best of us face challenges. Here’s how to troubleshoot some common rabbet joint issues:
| Issue | Solution |
|---|---|
| Uneven Cuts | Use a shoulder plane to even out uneven sides of the rabbet. |
| Rabbet Depth Issues | If too deep, fill with a wood shim; if too shallow, deepen with careful chiseling. |
| Mating Piece Fit | Ensure the rabbet fits perfectly with its mating piece; refine edges if too tight, use wood filler for minor gaps if too loose. |
Addressing uneven cuts can be a pain. If one side of your rabbet is deeper than the other, use a shoulder plane to even it out.
If your rabbet is too deep or shallow, don’t panic. Deep rabbets can be filled with a wood shim, while shallow ones can be deepened with careful chiseling.
Lastly, always ensure the rabbet fits perfectly with its mating piece. A rabbet joint’s beauty lies in its snug fit. If it’s too tight, refine the edges. Too loose? Consider starting over or using wood filler for minor gaps.
Sanding and Smoothing the Rabbet
Crafting a rabbet joint is only half the battle. The real magic lies in the finishing touches.
The importance of a smooth finish cannot be overstated. A smooth rabbet not only looks professional but also ensures a snug fit. Think of it as the difference between a handcrafted Italian suit and a one-size-fits-all ensemble.
When it comes to achieving that silky finish, you have options. Hand sanding vs. using sanding blocks is a debate as old as time (or at least as old as sandpaper). Hand sanding offers a personal touch, allowing you to feel every groove and imperfection. Sanding blocks, on the other hand, provide consistent pressure, ensuring an even finish.
Looking for tips for a flawless surface? Always sand in the direction of the wood grain, start with coarse-grit sandpaper and work your way to finer grits, and don’t forget to wipe away the dust between sanding sessions.
For more on perfecting your woodworking techniques, dive into How to Use a Pry Bar Scraper Correctly – Hand Tools DIY.
Joining the Rabbet with Other Pieces
Now that your rabbet is smooth as silk, it’s time to join forces with its counterpart.
| Joining Technique | Description |
|---|---|
| Adhesives | Wood glue is a common choice for joining rabbet joints, providing strong adhesion when applied correctly. |
| Fasteners | Screws or nails can be used for added strength; make sure they’re countersunk to maintain a smooth finish on the joint. |
| Alignment and Square | Achieving a square and aligned joint is crucial for the success of a rabbet joint. A carpenter’s square is an invaluable tool for ensuring that the joint fits together accurately. |
There are myriad techniques for a strong joint. Some woodworkers swear by dovetail joints, while others are mortise and tenon enthusiasts. But when it comes to rabbet joints, the key lies in the fit.
Using adhesives and fasteners can bolster the strength of your joint. Wood glue is a staple, but for added security, consider screws or nails. Just ensure they’re countersunk to maintain that smooth finish.
Lastly, always aim for a square and aligned joint. A carpenter’s square is invaluable here. After all, a rabbet joint is like a dance – it’s all about the perfect partnership.
For a deep dive into rabbet joints, check out Making Rabbets with Woodworking Hand Tools.
Maintenance and Care for Rabbet Joints
Craftsmanship is about more than creation; it’s about preservation.
Protecting the joint from moisture and environmental factors is crucial. A sealant or wood finish can be your rabbet joint’s best friend, shielding it from the elements and ensuring longevity.
Regular inspection for wear and tear is also essential. Over time, even the sturdiest joints can weaken. By catching issues early, you can prevent more significant problems down the line.
And if you do spot a problem? Repairing and reinforcing old rabbet joints can breathe new life into your creations. Whether it’s adding a shim, re-sanding, or applying a fresh coat of sealant, a little TLC goes a long way.
Frequently Asked Questions
How do I use hand tools to cut a rabbet for a rabbet joint?
To Explain How You Would Use Hand Tools When Cutting A rabbit for A rabbit joint, start by marking the wood, then use a chisel for initial cuts, and refine with a shoulder plane.
Why are hand tools preferred for rabbet joints?
Hand tools offer unparalleled precision and control, making them ideal for crafting perfect rabbet joints.
Which hand tools are essential for this task?
- Marking gauge for precision
- Chisels for initial cuts
- Shoulder plane for refining the rabbet
Can I use power tools instead of hand tools for rabbet joints?
While power tools can be used, hand tools provide more control and precision, especially for intricate rabbet joints.
How do I ensure a smooth finish on the rabbet?
After cutting, use sanding blocks or hand sanding techniques to achieve a flawless surface.
What are common mistakes to avoid when cutting a rabbet joint?
Avoid cutting too deep, not marking the wood properly, and not ensuring a clutter-free workspace.
How do I maintain and care for my rabbet joints?
Protect the joint from moisture, inspect regularly for wear and tear, and repair as needed.
Conclusion
Mastering the art of using hand tools for woodworking tasks, especially when aiming to Explain How You Would Use Hand Tools When Cutting A rabbit for A rabbit Joint, is a rewarding endeavor. With the right techniques and a bit of practice, you can achieve precise and durable rabbet joints that stand the test of time.
Thank you for reading!