Updated June 2026. Installing a 240V outlet requires a double-pole circuit breaker, the right gauge wire (10 AWG for 30A circuits, 8 AWG for 40–50A), and the correct NEMA receptacle. The full job takes 2–4 hours for a competent DIYer — but only if you’re genuinely comfortable opening your electrical panel. If that makes you nervous, skip to the When to Call an Electrician section. Honest answer: for a lot of people, calling a pro is the right move.
What Needs a 240V Outlet?
Standard household outlets run on 120V — enough for lamps, phone chargers, your toaster. A 240V circuit uses two hot legs from your panel simultaneously, which doubles the voltage and makes high-draw appliances possible without tripped breakers or overheated wire.
Common reasons to add a 240V circuit:
- Electric clothes dryer — almost always 30A, typically a NEMA 14-30 receptacle (or older NEMA 10-30 on pre-1996 installs)
- Level 2 EV charger — usually 40–50A; a ChargePoint Home Flex or Tesla Wall Connector calls for a 50A circuit, NEMA 14-50 outlet
- Electric range or oven — usually 50A, NEMA 14-50
- Air compressor or welder — depends on motor size; check your manual for amperage draw
- Central AC or mini-split — some run on 240V single-phase; nameplate will confirm
The appliance nameplate tells you the amperage draw. Size the circuit to 125% of that draw for continuous loads — that’s the NEC rule. A 32A Level 2 charger needs a 40A minimum circuit.
Tools and Materials
Get everything together before you start. Running to the hardware store mid-job with the panel open is not a situation you want to be in.
Tools You’ll Need
- Non-contact voltage tester — not optional, a Klein NCVT-3 or similar works fine
- Wire stripper rated for the gauge you’re working with
- Flathead and Phillips screwdrivers, multiple sizes
- Drill with a 3/8″ bit for running through studs
- Fish tape or wire-pulling rods if running through finished walls
- Utility knife for trimming cable jacket
- Multimeter or a 240V outlet tester for final verification
Materials You’ll Need
- Double-pole circuit breaker — must match your panel brand. Square D, Eaton, Siemens, and GE breakers are NOT cross-compatible. Check the panel label inside the door for approved brands.
- NM-B cable (Romex): 10/3 for a 30A circuit, 8/3 for a 40A circuit, 6/3 for 50A. The “/3” means three conductors plus a bare copper ground.
- NEMA receptacle: 14-30 for dryers, 14-50 for EV chargers and ranges, 6-30 or 6-50 for welders and compressors (no neutral needed on those).
- Single-gang electrical box, rated for your wire size
- Cable clamp for the box
- Cable staples
- EMT conduit and fittings if running exposed wire in a garage or basement
One thing worth mentioning about breakers: I ordered a “compatible” off-brand breaker for a Square D QO panel once. It looked right, seated okay-ish, but the arc-fault protection wasn’t listed for that panel. Spent $18 saving money, then spent $35 buying the correct Square D breaker anyway. Buy the right one first.
NEMA Receptacle Types: Which One Do You Need?
This is where DIYers get confused. The outlet shape depends on both voltage and amperage:
- NEMA 14-30 — 240V, 30A, 4-prong (two hots + neutral + ground). Standard for electric dryers.
- NEMA 14-50 — 240V, 50A, 4-prong. Used for ranges and most EV chargers. Also the “RV park outlet” shape.
- NEMA 6-30 — 240V, 30A, 3-prong (two hots + ground, no neutral). Welders and air compressors that run entirely on 240V.
- NEMA 6-50 — 240V, 50A, 3-prong (no neutral). Larger welding equipment, some plasma cutters.
- NEMA 10-30 — older 3-prong dryer outlet from before 1996. Still common in existing homes. Not permitted on new installations; code now requires NEMA 14-30.
For new circuits, always install 4-prong outlets where available. They include a dedicated ground wire, which is both safer and current NEC code. The old 3-prong dryer outlets bonded neutral and ground together — that’s not allowed on new work.
How to Install a 240 Volt Outlet: Step by Step
I’m walking through a 30A dryer outlet installation — NEMA 14-30 with 10/3 NM-B cable — because that’s the most common request. The process is identical for other amperages; just swap the wire gauge, breaker rating, and receptacle type.
Step 1: Turn Off the Main Breaker and Confirm the Panel Is Dead
Flip the main breaker to OFF. This de-energizes the bus bars that individual circuit breakers connect to. Now use your voltage tester near the bus bars before touching anything. If it beeps, stop. Something isn’t right.
The two thick cables entering from the top — the service entrance conductors — remain live even with the main off. They run directly from the utility transformer and carry 240V at all times. Never touch them. Never work near them. If your installation requires getting close to those terminals, call the utility company or a licensed electrician.
Step 2: Plan the Wire Route and Mount the Outlet Box
Decide where the outlet goes. For a dryer, it’s usually on the laundry room wall, about 12–18 inches off the floor. Mark the location, cut the drywall opening, and mount the electrical box. A single-gang metal box works fine for a NEMA 14-30.
Plan your cable route from box to panel. In an unfinished basement, you can run the cable along joists and staple it every 54 inches (NEC requirement for NM-B). In a finished wall, you’ll need a fish tape and a drill to get through top plates.
Step 3: Run the Wire
Pull 10/3 NM-B from the panel location to the outlet box, leaving at least 12 inches of extra cable at both ends. You can always trim; you can’t add. Feed the cable through the cable clamp in the box and tighten the clamp so it won’t pull out. You need at least 6 inches of wire inside the box for working room.
At the panel end, leave 18–24 inches of extra length. This gives you room to route the wire neatly inside the panel enclosure.
Staple the cable within 12 inches of every box and every 4.5 feet along the run. Use staples sized for 10/3 cable — they’re wider than the ones for 12 or 14 gauge. Drive them with a light touch; a staple hammered too deep will nick the insulation.
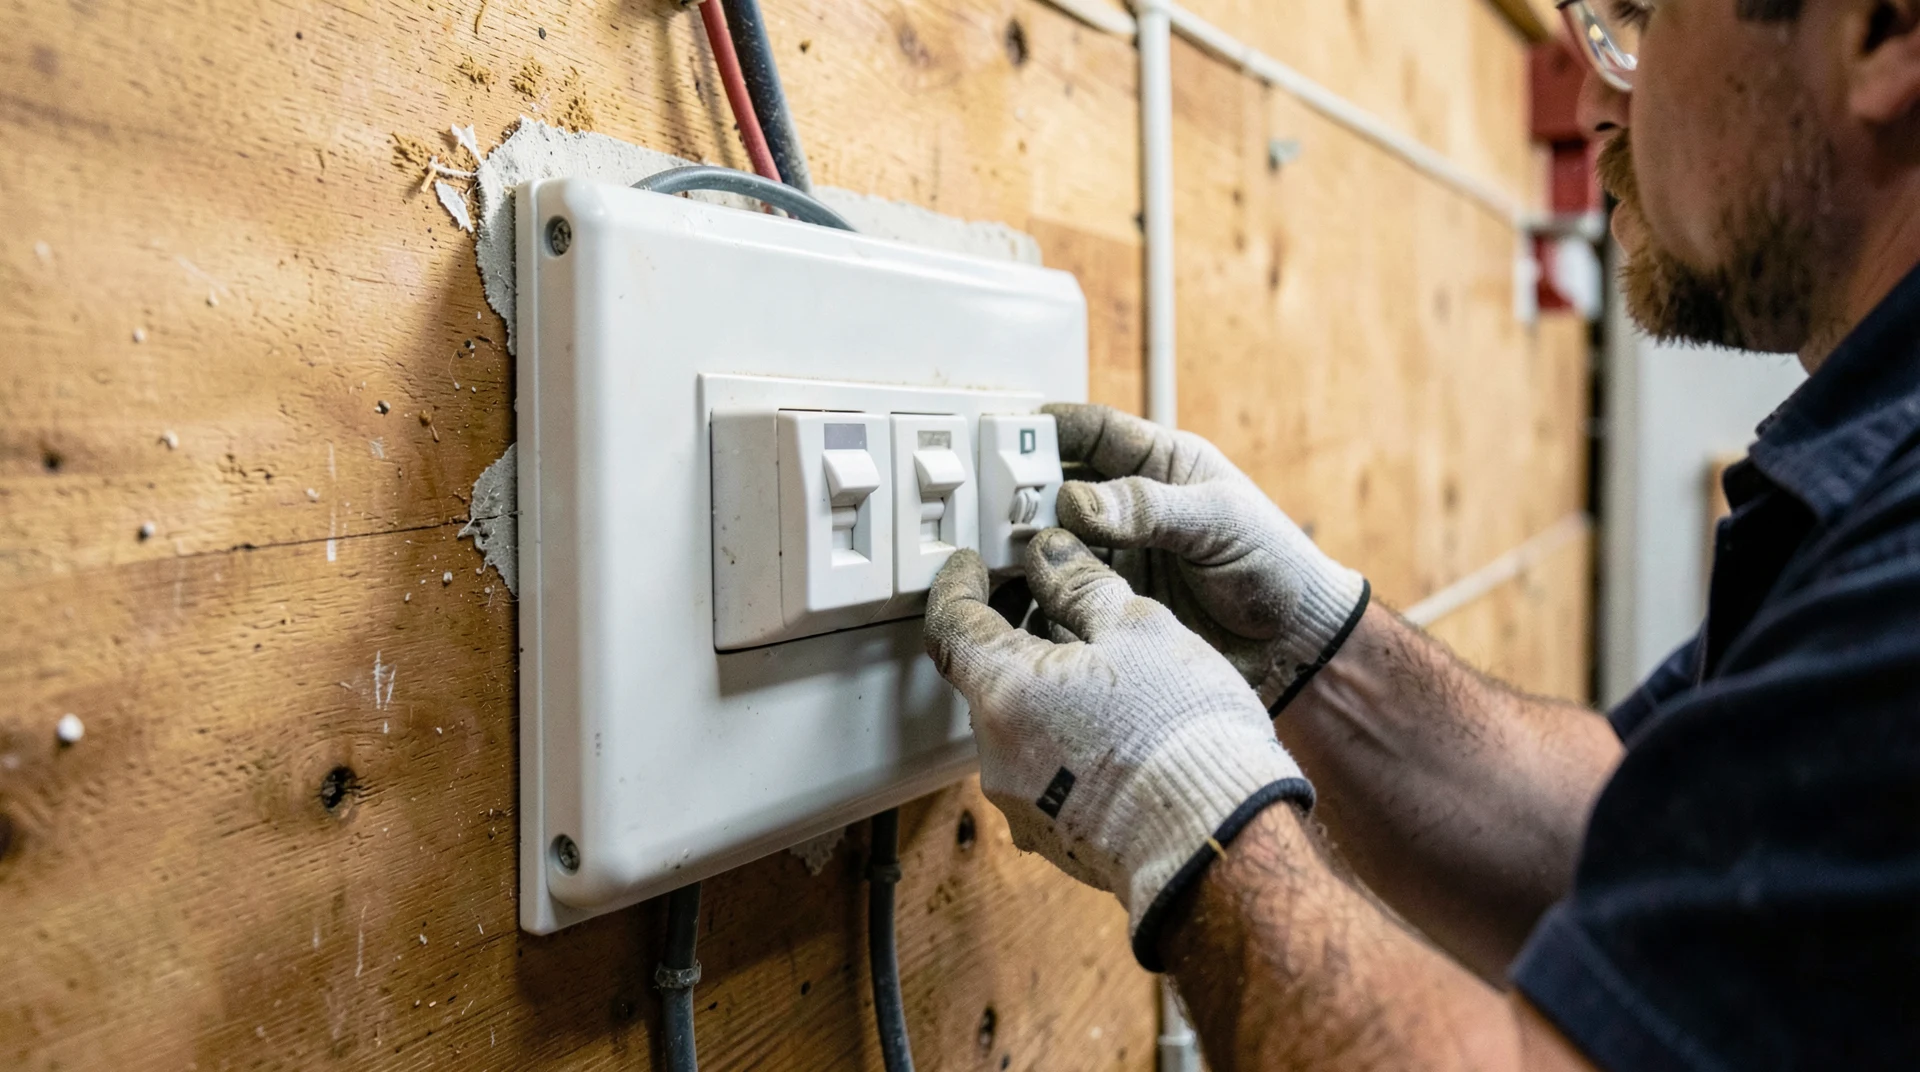
Step 4: Wire the Receptacle
Strip about 6 inches of outer cable jacket, then strip 3/4 inch of insulation from each individual conductor. A 10/3 NM-B has four wires: black (hot), red (hot), white (neutral), and bare copper (ground).
On a NEMA 14-30 receptacle, the terminals are labeled:
- Black wire → X terminal (one hot leg)
- Red wire → Y terminal (second hot leg)
- White wire → W terminal (neutral — the L-shaped slot)
- Bare copper → green ground screw
Tighten every screw firmly. Loose connections cause arcing, and arcing causes fires. Don’t strip-mine the screw head chasing maximum torque — firm and snug, not cracked plastic. Fold the wires neatly into the box (ground first, then neutral, then hots), seat the receptacle, and attach the cover plate.
Step 5: Land the Wires at the Panel
With the main breaker still off, remove the panel cover (typically 4–6 screws). Find an open two-slot position for the new double-pole breaker.
- Strip the cable jacket back 12 inches inside the panel to expose the conductors with working room
- Run the white neutral wire to the neutral bus bar — the long silver bar with many screws where all the other white wires land. Tighten the screw.
- Run the bare copper ground wire to the ground bus bar. In a main panel, this is often the same bar as the neutral. In a subpanel, ground and neutral must be separate bars — do not bond them.
- Snap the double-pole breaker into position — it clips onto two adjacent bus bar stabs simultaneously. You’ll feel it seat.
- Connect the black wire to one terminal on the breaker and the red wire to the other. Tighten both. On a double-pole breaker, it doesn’t matter which terminal gets black versus red — both hot conductors see the same voltage from opposite phases.
Route the wire neatly along the inside edge of the panel before closing up. A messy panel makes future work harder and impresses no one.
Step 6: Restore Power and Test
Do a final visual check inside the panel: no bare wire strands shorting to anything, all screws tight, no nicked insulation. Replace the panel cover.
Flip the main breaker back on. Leave the new double-pole breaker in the OFF position for now. At the new outlet, plug in a 240V outlet tester — a Sperry DSA-25A or similar. Flip the new breaker ON. A correct wiring job shows two hot legs (120V each to neutral) with correct polarity and ground. A standard 120V outlet tester won’t work here; you need a 240V-rated tester.
If the breaker trips immediately, turn everything off and recheck your connections. If the tester shows a wiring fault, same — kill power, open the panel, and recheck where the wires landed. Most errors are a loose connection or a wire on the wrong terminal.
Common Mistakes That Cause Problems
Wrong Wire Gauge for the Breaker Size
This one causes fires. 12 AWG wire is rated for 20A. Put it on a 30A breaker and the wire can overheat before the breaker trips. Always match wire to breaker: 10 AWG for 30A, 8 AWG for 40A, 6 AWG for 50A. When in doubt, go heavier (lower AWG number).
Using a Breaker Not Listed for Your Panel
Physically fitting isn’t the same as being listed for that panel. Breaker families are tested together as a system. Using the wrong breaker voids the panel listing and creates arc hazards. Check the panel label — it lists approved breaker brands and models.
Skipping the Ground Wire or Bonding Ground to Neutral at the Outlet
The ground wire is what clears a fault safely. Without it, a fault current can energize the appliance frame and electrocute someone touching it. And on new work, ground and neutral must NOT be bonded at the outlet — only at the main service panel.
Not Verifying Dead Before Working
Breakers can be mislabeled. Voltage testers take two seconds. Skipping this step is where people get hurt. Test every time, no matter how confident you are about the breaker you flipped.
Mixing Up Hot Wires on a 3-Prong Outlet
On a NEMA 6-series outlet (no neutral), both terminals are hot. Swapping them doesn’t matter electrically for the outlet itself — but if you’re wiring a dedicated machine, some equipment has specific phase requirements. Check the manual if you’re unsure.
When to Call a Licensed Electrician
Some situations are beyond a DIY electrical job — not because the concepts are hard, but because the consequences of errors are severe.
- Your panel is full. No open double-pole slots means you need a tandem breaker (only if your panel’s label permits it) or a subpanel. Running a subpanel feeder involves working near the service entrance. Different scope, higher risk.
- Aluminum branch circuit wiring. Homes built roughly 1965–1973 sometimes have aluminum wiring on branch circuits. It requires special aluminum-rated devices and anti-oxidant compound at connections. Treat it like copper and you’ll eventually have overheating.
- Federal Pacific or Zinsco panels. These have documented breaker failure modes. Adding circuits to a panel that doesn’t reliably trip is not a fix — it’s a liability. Get the panel evaluated first.
- Permit required + local rules. Many jurisdictions require a licensed electrician to pull permits. Some require final inspection by the AHJ (authority having jurisdiction). If an inspector needs to sign off, understand the rules before starting.
- You’re not confident. This is the most important one. Electrical confidence that exceeds actual knowledge is how serious accidents happen. A licensed electrician charges $200–$400 for a straightforward circuit addition. Against a house fire or an electrocution, that’s an easy trade.
For more on home electrical safety and panel basics, our electrical category covers the fundamentals — reading your breaker panel, understanding circuit ratings, and knowing which jobs require professional hands.
Frequently Asked Questions
Do I need a permit to install a 240V outlet?
In most US jurisdictions, yes. A new circuit — including a 240V outlet — typically requires an electrical permit and an inspection. Requirements vary by city and state. Some areas allow homeowners to pull their own permits for work on their primary residence; others require a licensed electrician to do it. Check with your local building department before starting. Unpermitted electrical work can void your homeowner’s insurance claim and create problems when you sell.
What wire gauge do I need for a 240V outlet?
It depends on the circuit amperage. For a 30A circuit (electric dryer), use 10 AWG wire. For a 40A circuit, use 8 AWG. For a 50A circuit (range, EV charger), use 6 AWG. Never use wire smaller than what the breaker calls for — the breaker protects the wire, and undersized wire overheats before the breaker trips. When uncertain, size up.
What is the difference between a NEMA 14-30 and NEMA 14-50 outlet?
Both are 4-prong 240V receptacles with two hot wires, one neutral, and one ground. The difference is amperage rating and pin shape: NEMA 14-30 is rated for 30A and is the standard dryer outlet. NEMA 14-50 is rated for 50A and is used for electric ranges and Level 2 EV chargers. The pin configurations are different so the plugs are not interchangeable — match the outlet type to your appliance’s plug.
Is 220V the same as 240V?
For practical purposes, yes. US power grid nominal voltage is 240V across two phases, but real-world voltage at the panel fluctuates between roughly 220V and 240V depending on utility load and distance from the transformer. Older publications and appliances labeled it “220V”; modern NEC code and most manufacturers now say “240V.” If someone says they need a 220V outlet, they need the same thing as a 240V outlet — a double-pole circuit from the panel.
Can I add a 240V outlet to an existing circuit?
No. Each 240V outlet needs a dedicated circuit — its own double-pole breaker in the panel, running wire exclusively to that outlet. You cannot tap off an existing circuit to add a 240V receptacle. NEC requires dedicated circuits for large appliances because a dryer alone draws 20–24A continuously, which would overload any shared circuit. Each large appliance gets its own breaker and its own run of wire from the panel.
Thank you for reading!