If you’re a DIYer, trying your hand at remodeling a house, or even a burglar planning a new adventure, you’re at the right place. It’s a no-brainer that using hand tools correctly not only gets the job done faster but also ensures personal safety.
A pry bar is used to pry things open or pull them apart, among many other uses. It is similar to a crowbar, except that it’s adjustable. Find out all you need to know!

3 Most Commonly Used Pry Bars
Are you wondering what are the different types of pry bars available in the market? Here are the three of the most commonly used pry bars available in the market:
- Flat pry bar- It’s ideal for nail pulling, scraping, lifting, and levering. They are mostly used for house maintenance. This one is as basic as they come.
- Pinch pry bar- Also known as an alignment bar, it’s used to align mating holes during construction. It’s one of the longest and heaviest pry bars out there.
- Digging pry bar- It’s ideal for digging and loosening compact surfaces but is also used while levering. It can also be used for the purpose of fencing while digging holes.
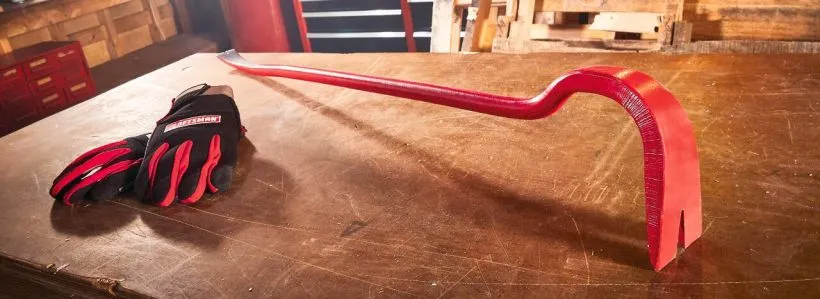
The Anatomy Of A 15-Inch Utility Pry Bar
To understand the usage of it better, first let us dive into the main parts of a pry bar. Have a look!
Claw
The claw comes in a variety of shapes, depending upon the type of pry bar employed for the task.
- A straight claw, like its name suggests, is forged in-line with the shaft.
- A bent claw, while increasing leverage, ensures minimum damage to the underlying surface.
- And while a wide claw obviously provides a larger surface for prying, a pointed claw can be inserted into surfaces.
Shaft
Just like the claw, the shaft comes in different shapes and sizes, with individual utilities.
- A flat shaft (as depicted above) is best for tight surfaces.
- A round shaft offers a better grip.
- A hexagonal shaft, also designed for greater grip, is best for levering.
- A contour shaft is curved backward for the same purpose.
- An I-Beam shaft, although the light is quite strong.
Instructions For Using A 15-Inch Utility Pry Bar
Are you confused about using a 15-inch utility pry bar? Here are some curated instructions for beginners:
- Inspect your tool for any prior damage, in case it’s not new. Avoid using a broken or chipped 15-inch utility pry-bar since it’s a safety hazard.
- Wear gloves or ensure your hands are not slippery. Any grease or sweat needs to be wiped-off.
- Wear safety glasses and a construction helmet if you are prying things open with your 15-inch utility pry bar.
Separating objects
- Take the flat end of the bent claw (refer to image four above).
- Insert it between the two objects.
- Grip the other end and pull outwards.
- Use a block of wood for additional leverage.
Extracting nails
- Take the flat end of the straight claw (refer to image four above).
- Place its fissure around either side of the head of the nail.
- Carefully apply pressure downwards, gripping the other end.
- Hammer the pry bar if you face trouble getting beneath the nail head.
- Increase the pressure on the fissure till most of the nail gets extracted.
- Now, use the curved end to pull the rest of it out.

Do’s and Don’ts
Your personal safety is paramount for us. It’s routine to get injured while dealing with objects of this nature, especially when you’re a novice.
So, here are a few unavoidable dos and don’ts for using a 15-inch utility pry bar:
| DO’S | DON’TS |
| Legs should be shoulder-width apart and slightly bent. | Strictly avoid placing flimsy objects under the shaft of the bar for supplemental leverage. |
| Just in case you have to bend to perform the work, bend at the knees. Always keep your back straight. | Never position your body directly over the 15-inch utility pry bar. |
| Ensure a balanced posture while lifting heavy objects. | Avoid putting unnecessary or over-the-top pressure on the spine. It could easily lead to spinal injuries. |
The applications of the hand tool
The uses of this amazing had tool are plenty! Do you need a better insight into it? Here are some of the best and most common applications of a pry bar:
- Removing carpet.
- Removing floor tiling.
- Opening cans.
- Scraping off old paint.
- Installing heavy doors.
- Removing molding.
- Extracting nails.
- Forcing jammed doors and windows open.
- Reupholstering furniture.
- Separating closely set objects.
Answers To Some Frequently Asked Questions
Q. What’s the difference between a crowbar and a pry bar?
They are used interchangeably; pry bars are often referred to as crowbars. Crowbars are essentially all bars made out of steel, with a flattened end. They’re meant to be used as levers.
Q. How do you maintain a 15-inch utility pry bar?
For maintaining a pristine condition for a prolonged period of time-
- Polish the claws regularly.
- Use a longer bar for lifting heavier objects.
- Make sure the protective finish doesn’t chip away.
- Do not keep away wet bars, always dry them, and keep them stored in a dry place.
- Apply non-corrosive oil on the surface of the pry bar after polishing.
- Never exert excessive force on the shaft, as it will lead to a deformed shape.
Q. Which pry bar gives more leverage?
Long beveled claw pry bar and flat claw pry bar serve this purpose quite efficiently. Beveled claw bars make a smooth sail getting underneath surfaces. And, since flat claw pry bars can be inserted deeper into compact surfaces, even they come in handy.
Q. What are the best brands of pry bars?
- TEKTON
- Stanley
- Vaughan
- Titan
- Crescent
Final words
While handling equipment such as a 15-inch utility pry bar may intimidate beginners, it’s not that tricky. All we need is a little confidence and lots of precaution. The aforementioned instructions, if sincerely followed through, are enough to get you by. You never know; you may end up remodeling houses with surprising ease and proficiency.
Thank you for reading!