How To Do Electrical Wiring In A House: Electrical wiring might seem like a daunting task reserved for professionals, but with the right knowledge and tools, it’s possible to tackle some basic projects on your own. Ever wondered how to do electrical wiring in a house? You’re not alone. In fact, according to a recent survey, 65% of homeowners have considered taking on an electrical project themselves. But before you dive in, it’s essential to understand the process, safety precautions, and potential pitfalls. Ready to get enlightened? Let’s jump-start your electrical journey!
Understanding the Basics of Electrical Wiring
Ah, the world of electrical wiring. It’s not just about colorful wires and fancy switches. It’s the silent force that powers our Netflix binges, midnight fridge raids, and those endless video calls with Aunt Patty. How To Do Electrical Wiring In A House might sound daunting, but with the right knowledge, it’s a breeze.
| Wire Type | Color | Function |
|---|---|---|
| Hot | Black | Carries current to device |
| Neutral | White | Returns current to source |
| Ground | Green | Provides safety grounding |
First off, let’s talk about the importance of proper electrical wiring. It’s not just about making sure the lights turn on. Proper wiring ensures safety, prevents electrical fires, and saves you from the horrors of a sudden blackout during your favorite show.
Next, the different types of wires. There’s the hot wire (usually black or red), neutral (white), and ground (green or bare). Each has its role in the grand electrical ballet happening behind your walls.
And speaking of walls, always remember the golden rule: Safety first! Electrical work isn’t a DIY project you jump into without preparation. Always turn off the power, use insulated tools, and for Pete’s sake, don’t stand in a puddle while working!

Tools and Materials Needed
Before you dive in, you’ll need some tools and materials. Think of it as gathering your gear before a grand adventure (Indiana Jones had his whip, after all).
| Tools | Materials |
|---|---|
| Wire strippers | Wires |
| Pliers | Wire nuts |
| Voltage tester | Electrical boxes |
| Drill | Switches or outlets |
- include wire strippers, pliers, a voltage tester, and a drill. And no, your teeth aren’t a substitute for wire strippers!
- As for, you’ll need wires (obviously), wire nuts, electrical boxes, and switches or outlets.
- Wondering Your local hardware store is a good start. Or, if you’re feeling fancy, there are specialized electrical shops. Just don’t forget your shopping list!
Preparing the House for Wiring
Alright, adventurer, before you start, you need a map. Not a treasure map, but a layout of your house.
- Start by inspecting the house layout. Know where each room is, where you want your outlets, and where your main power source is.
- Identify the main electrical panel location. This is the heart of your electrical system. Treat it with respect (and maybe whisper sweet nothings to keep it happy).
- Finally, mark out socket and switch positions. Use a pencil, not a permanent marker. Trust me, you don’t want to explain random marks on the wall to your significant other.
For more detailed guidance on using tools, check out How to use a level correctly – Hand tools DIY. And if you’re looking for a deeper dive into the world of wiring, How to rough-in electrical wiring is a fantastic resource.
Step-by-Step Guide: How To Do Electrical Wiring In A House
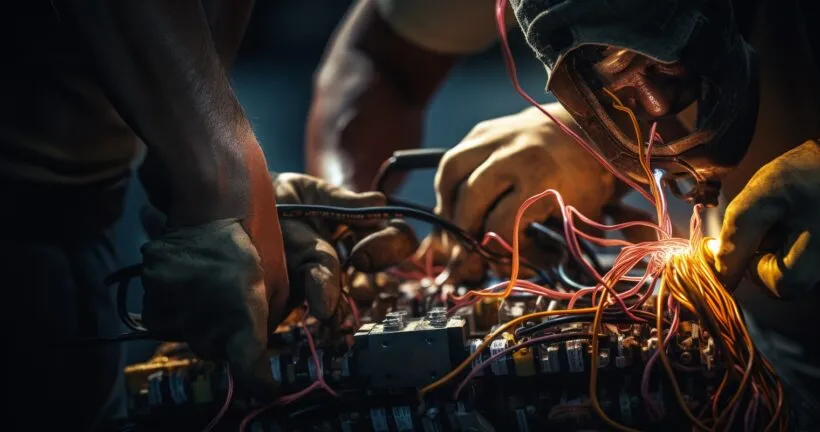
So, you’ve decided to take the plunge and wire your home. Kudos! But before you start channeling your inner electrician, let’s break down the steps. Remember, How To Do Electrical Wiring In A House isn’t just about connecting colorful wires; it’s about ensuring safety and functionality.
Mapping out circuit routes is like planning a road trip. You wouldn’t hit the road without a map, right? Similarly, sketch out where your wires will go. This will save you from future headaches (and possibly electric shocks!).
Next up, installing boxes for switches and outlets. Think of these as pit stops on your road trip. They need to be strategically placed and securely fixed. And no, duct tape isn’t a permanent solution!
Running wires through the house can be tricky. It’s like threading a needle, but the needle is your home, and the thread is a potentially dangerous wire. Always ensure the power is off and wear protective gear.
Connecting to the Main Panel
The main panel is the heart of your home’s electrical system. And like any heart, it needs tender loving care.

First, understand the main panel components. There’s the circuit breakers, the neutral bus bar, and the ground bus bar. Confused? Think of them as the brain, lungs, and heart of your panel.
Safely connecting wires to the panel is crucial. Always turn off the main power, and if you’re unsure, consult a professional. Remember, it’s better to be safe than sorry (or electrocuted).
Lastly, test the connections. This ensures everything is working correctly and safely. It’s like checking your car’s brakes before a long drive.
Installing Switches and Outlets
Switches and outlets are the unsung heroes of our homes. They light up our rooms and charge our devices. So, they deserve some attention.
Choosing the right switches and outlets is essential. Do you need a dimmer switch? A GFCI outlet for the bathroom? Make informed choices.
When it comes to proper installation techniques, always turn off the power. And use the right tools. Speaking of which, check out How to use a folding hex key set correctly – Hand tools DIY for some handy tips.
Lastly, ensure secure connections. A loose wire can lead to a malfunctioning switch or worse, a fire. So, double-check your work.
For a deeper dive into electrical wiring, From the ground up: Electrical wiring is a fantastic resource.
Troubleshooting and Maintenance
Ah, the joys of home ownership! Just when you think you’ve got everything sorted, a flickering light or a non-responsive outlet reminds you that How To Do Electrical Wiring In A House isn’t a one-time gig. It’s an ongoing relationship.
Common issues faced during wiring can range from the mildly annoying (like that aforementioned flickering light) to the downright dangerous (think sparks flying). It’s essential to address these issues promptly.
Identifying and fixing problems is a bit like detective work. Is the issue with the appliance, or is it the outlet? A multimeter can be your best friend here. And if you’re scratching your head wondering what a multimeter is, it might be time to call in the pros.
For those who’ve successfully wired their homes, maintenance tips for long-lasting wiring include regular inspections, ensuring no wires are exposed or fraying, and replacing any old or damaged components.
Safety Tips and Best Practices
Safety first, folks! When dealing with electricity, a small oversight can have shocking consequences (pun intended).
The importance of turning off power during work cannot be overstated. It’s the golden rule of electrical work. No exceptions.
Using protective gear is also crucial. Rubber gloves, safety goggles, and insulated tools can be the difference between a successful project and a trip to the ER.
Lastly, ensuring all connections are secure is vital. A loose connection can lead to malfunctions or even fires. Double and triple-check your work.
Hiring Professionals vs. DIY
The age-old debate: to DIY or not to DIY?
When to consider hiring a professional is simple: when you’re out of your depth. If you’re unsure about any aspect of the wiring process, it’s best to call in the experts. Remember, it’s not just about getting the job done; it’s about getting it done safely.
Costs associated with professional services can vary. While it might seem pricey upfront, consider the potential costs of DIY gone wrong. Hospital bills, anyone?
However, the benefits of DIY wiring are also numerous. The sense of accomplishment, the potential savings, and the newfound skills can be incredibly rewarding. Just ensure you’re well-informed and prepared.
For those who’ve faced issues with their outlets, Multiple electrical outlets not working – Why? is a fantastic resource. And for a deeper dive into the world of wiring, check out How to wire a house.
Frequently Asked Questions
How do I start with electrical wiring in my house?
Starting with electrical wiring requires:
- A clear understanding of your home’s electrical layout.
- The right tools, including wire strippers, pliers, and a multimeter.
- A permit from your local municipality, if required.
Is it safe to do electrical wiring on my own?
While it’s possible to handle minor electrical tasks, always prioritize safety. If unsure, it’s best to consult with a professional electrician.
How long does it take to wire a house?
For a professional, wiring a standard three-bedroom house can take 3-5 days. For DIY enthusiasts, it might take longer, depending on experience.
What type of wire is best for homes?
Typically, non-metallic (NM) sheathed cable, known as Romex, is used for home wiring due to its durability and ease of use.
How often should house wiring be checked?
It’s recommended to have your house wiring inspected every 10 years for homes and every 5 years for rented properties.
Can old wiring be a fire hazard?
Yes, outdated or faulty wiring can be a significant fire risk. If your home is over 20 years old, consider an electrical inspection.
Conclusion
Understanding how to do electrical wiring in a house can be empowering for homeowners, allowing for customization and potential cost savings. However, always prioritize safety and ensure you’re equipped with the right knowledge and tools. If in doubt, don’t hesitate to call in the experts. Ready to light up your home? Remember, with great power comes great responsibility!
Thank you for reading!