Houseplants have a way of breathing life into our homes, purifying the air, and adding a touch of nature to our living spaces. But did you know that you can multiply the joy of houseplants without buying new ones? How To Take Cuttings From Houseplants is a time-tested method that allows gardeners to replicate their favorite plants. According to a survey by the National Gardening Association, 30% of houseplant enthusiasts have tried their hand at propagation. If you’re looking to dive into this rewarding gardening practice, you’re in the right place. Stay with us as we guide you through the process, step by step.
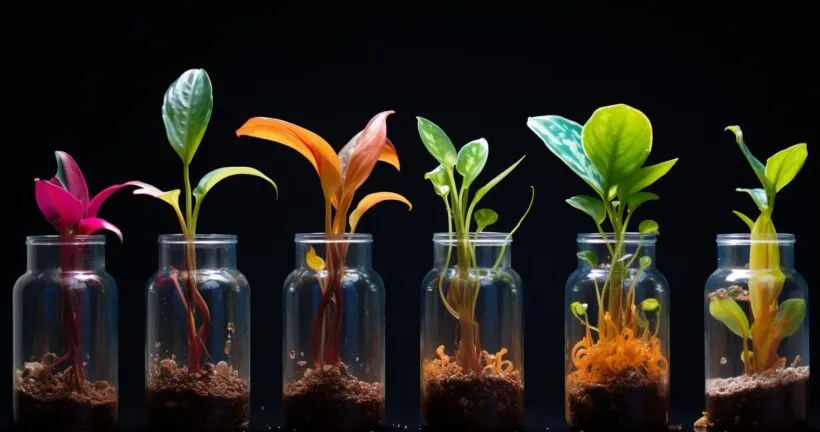
The Magic of Water Propagation
Ah, water propagation! It’s like watching a magic trick unfold right before your eyes. But instead of pulling a rabbit out of a hat, you’re pulling roots out of a stem. The science behind How To Take Cuttings From Houseplants and rooting them in water is fascinating. Essentially, the water provides a gentle, nurturing environment for the plant cutting to develop roots without the risk of soil-borne diseases.
Certain houseplants, like the ever-popular pile peroxides, seem to be made for this method. Their cuttings, when placed in water, often sprout roots in record time. But the real fun begins when you start experimenting. From pothos to philodendrons, you’ll be amazed at the variety of houseplants that can be propagated in water. And let’s be honest, there’s a certain thrill in discovering which plants root well in water and which ones… well, let’s just say they prefer the traditional soil method.
Benefits of Water Propagation
Water propagation isn’t just a fad; it comes with a host of benefits that make it a favorite among gardeners, both novice and seasoned.
| Benefit | Description |
|---|---|
| Simplicity and Cost-Effectiveness | Water propagation requires minimal supplies, making it a cost-effective method. No need for rooting hormones. |
| Visual Pleasure | Watching the development of roots in water provides a visual delight. You can witness the rooting process firsthand. |
| Gifting Potential | Rooted cuttings can be potted and shared as gifts. It’s a personalized and sustainable gesture that brings joy. |
For those looking to expand their indoor garden or simply try a new propagation method, water propagation is a fantastic option. Whether you’re a seasoned gardener or just starting out, the world of water propagation awaits. Dive in and let the magic begin!
Gathering Your Materials
Embarking on the journey of How To Take Cuttings From Houseplants? First things first, let’s gather our materials. It’s like prepping for a culinary masterpiece; you wouldn’t start cooking without all your ingredients, right?
| Material | Importance |
|---|---|
| Right Houseplant for Cuttings | Different plants have varying propagation success rates. Choose plants that are more likely to thrive in water. |
| Sharp Scissors or Knife | A clean cut minimizes plant damage. Dull tools can lead to jagged cuts and potential diseases. |
| Clean Jar or Glass of Water | Provides a nurturing environment for rooting. Ensure cleanliness and consider decorating the container. |
| Plant Pots and Multi-Purpose Compost | After rooting, cuttings need pots and compost to grow. These supplies ensure your new plants have a suitable environment for growth. |
Choosing the right houseplant for cuttings is paramount. Not all plants are created equal, and while some might propagate like they’re on a mission to conquer the world, others might be a tad more reserved. Do a little research or, better yet, experiment, and let your inner scientist shine!
Now, onto the tools. The importance of sharp scissors or a knife cannot be overstated. Think of it as a surgeon’s scalpel; it needs to be sharp to ensure a clean cut, minimizing damage to the plant. Dull tools can cause jagged cuts, leading to potential diseases.
Preparing your jar or glass of water is pretty straightforward. Ensure it’s clean, and if you’re feeling fancy, you can even decorate it. After all, it’s going to be your plant’s temporary home.
Lastly, don’t forget about plant pots and multi-purpose compost. Once your cuttings have rooted, they’ll need a cozy place to grow and thrive. And that’s where the pots and compost come into play.
The Cutting Process
Alright, green thumbs, it’s showtime! The cutting process might sound daunting, but with a sprinkle of patience and a dash of care, it’s as easy as pie.
Start by selecting healthy shoots of new growth. These are your plant’s babies, full of potential and vigor. Look for shoots that are vibrant and free from any signs of disease or pests.
When it comes to the right length for cuttings, aim for 10-20cm. It’s the sweet spot that provides enough stem for rooting while ensuring the cutting remains manageable.
Making the cut is an art in itself. Where and how to slice is crucial. Aim for just below a leaf node (those little bumps on the stem where leaves grow). This is where the magic happens, as roots tend to sprout from these nodes.
Finally, prepare the stem by removing the lower leaves, leaving a few at the top. This not only helps the cutting focus its energy on rooting but also ensures the leaves don’t rot when submerged in water.
For those looking to further their knowledge in DIY projects, check out this guide on How to Make Your Own Wooden Box Kit. Who knows, maybe your next project will be crafting a wooden box to store all your gardening tools!
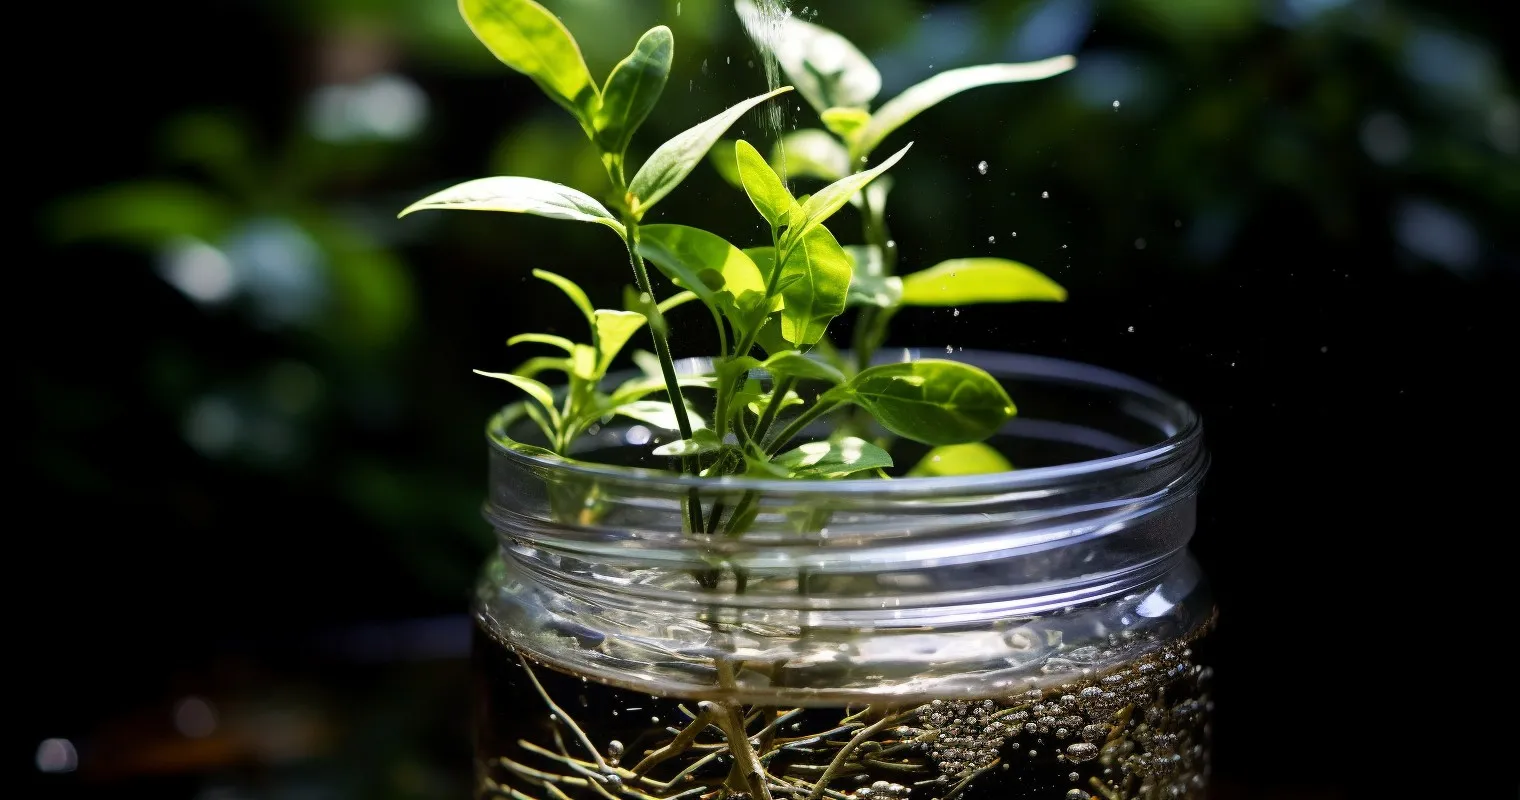
Monitoring Your Cuttings in Water
Ah, the waiting game! As you embark on the journey of How To Take Cuttings From Houseplants, patience is your best friend. But while you wait, there’s plenty to keep an eye on.
| Aspect to Monitor | Importance |
|---|---|
| Warmth and Brightness | Maintaining the right level of warmth and brightness ensures proper growth without scorching or stunting the cuttings. |
| Consistent Water Level | Evaporation can leave cuttings dry. Regularly topping up the water maintains the required hydration for successful rooting. |
| Growth of White Roots | White roots are indicators of successful propagation. Monitoring their growth helps you assess the progress of your cuttings. |
The ideal environment for your budding cuttings is a mix of warmth and brightness. Think of it as a cozy beach vacation for your plant. Too much sun can scorch them, while too little can hinder growth. Aim for that Goldilocks zone: just right.
Now, let’s talk hydration. Keeping the water level consistent is crucial. Evaporation is sneaky, and before you know it, your cuttings might be gasping for a drink. Regularly top up the water to ensure the stems remain submerged.
And here comes the exciting part: watching for white roots. These are the telltale signs of successful propagation. It’s like watching your favorite movie character make a grand entrance. When you spot these roots, give yourself a pat on the back. You’re on the right track!
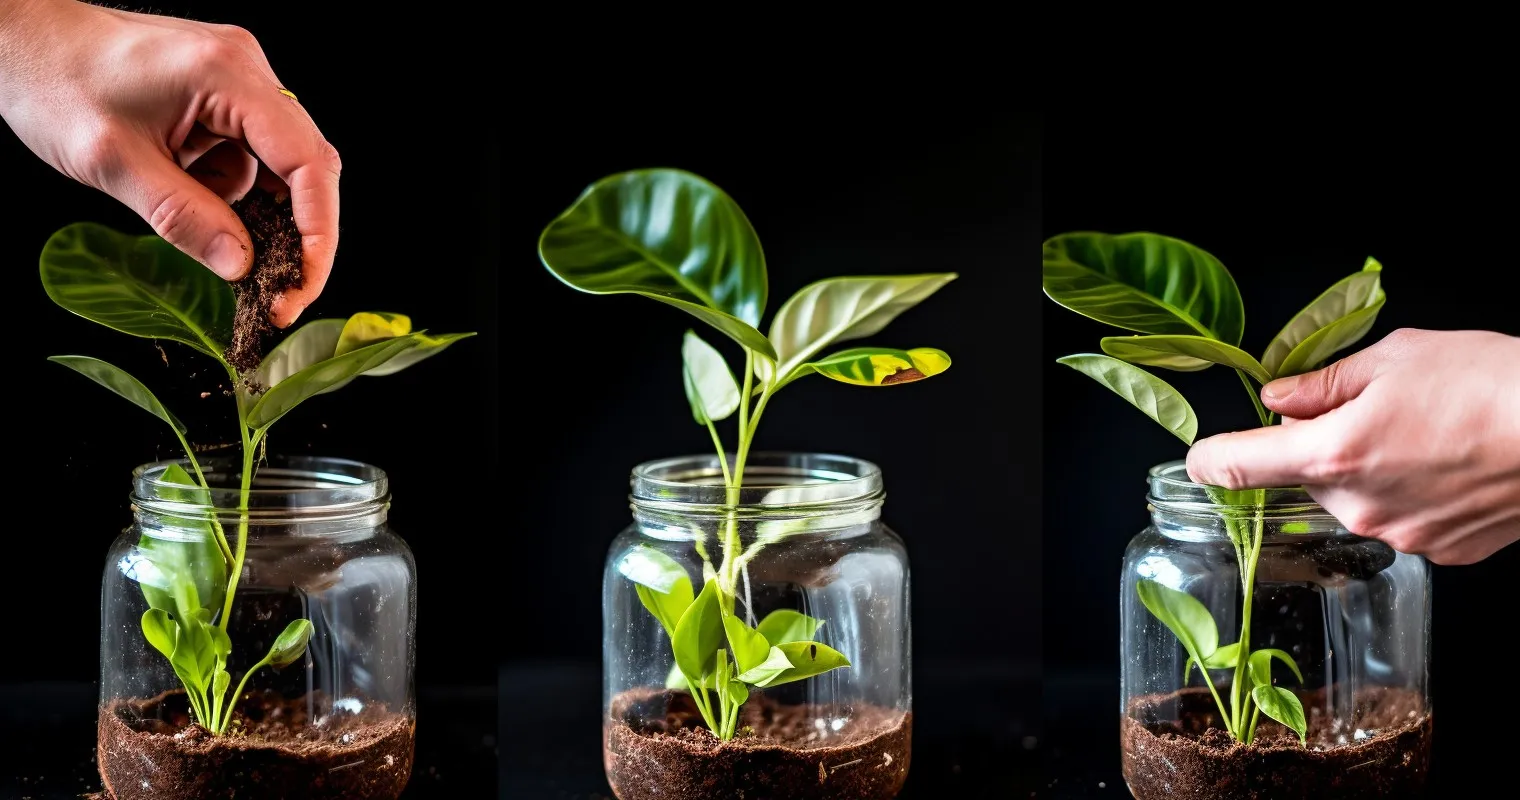
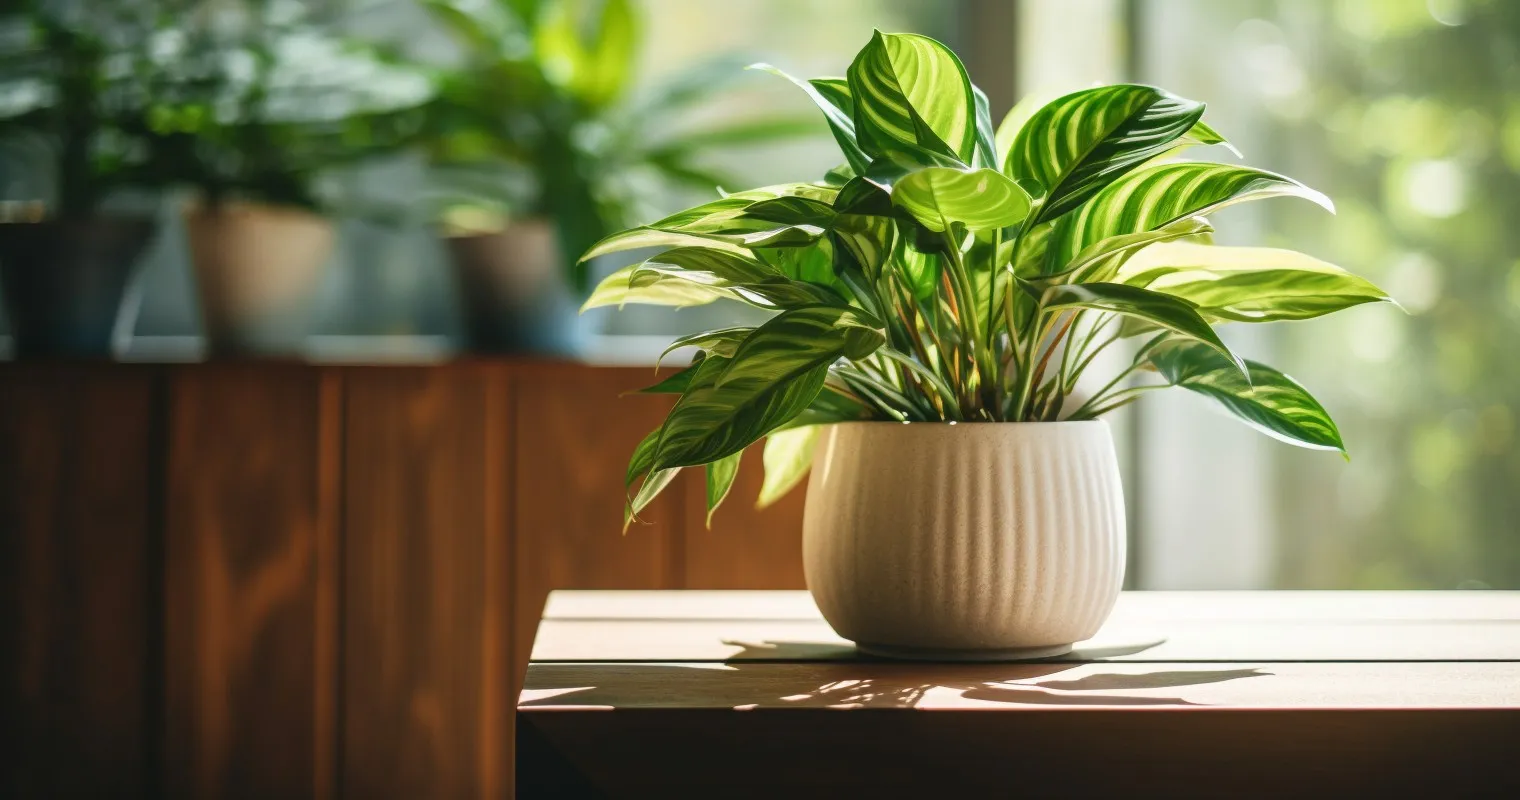
Transitioning to Soil
The water phase is just the beginning. Once your cuttings have flaunted their white roots, it’s time for the next big step: transitioning to soil.
Recognizing when a good root system has developed is key. Ideally, you’re looking for roots that are a few inches long. They should be robust, white, and healthy-looking. If they remind you of a mini forest, you’re good to go.
Now, onto potting the cuttings. This is where the compost connection comes into play. A well-draining compost is your best bet. Gently plant the cuttings, ensuring the roots are comfortably nestled in. Think of it as tucking them into bed.
Once potted, caring for your new plant is paramount. Ensure the soil remains moist but not waterlogged. As your plant grows, consider pinching the top to encourage branching. This will give you a fuller, bushier plant. And who doesn’t love a lush, green houseplant?
For those looking to spruce up their interiors, check out these Modern Classic Interior: 7 Tips from the Experts. After all, a beautiful houseplant deserves an equally stunning backdrop!
Frequently Asked Questions
What is the best time to take cuttings from houseplants?
Taking cuttings is best done during the growing season, typically spring or early summer.
How long does it take for cuttings to root?
Cuttings can take anywhere from a few days to several weeks to root, depending on the plant species.
Can all houseplants be propagated through cuttings?
No, not all houseplants can be propagated this way. It’s essential to research the specific plant you’re interested in.
How do I know if my cutting has been rooted successfully?
A rooted cutting will resist a gentle tug and often show new growth at the top.
Can I use tap water for water propagation?
Yes, but it’s recommended to let tap water sit for 24 hours to allow chlorine to evaporate.
Why are my cuttings rotting instead of rooting?
Cuttings can rot due to overwatering, contamination, or being taken from an unhealthy plant.
How often should I change the water when propagating in water?
It’s a good practice to change the water every 3-5 days to keep it fresh and oxygenated.
Conclusion
The art of taking cuttings is a testament to nature’s incredible ability to regenerate and flourish. With the right techniques, How To Take Cuttings From Houseplants can be a rewarding endeavor, allowing you to expand your indoor garden and share the joy with friends and family. As you embark on this gardening journey, remember to be patient, observant, and enjoy the process. Ready to get started? Grab a cutting and let the propagation begin!
Thank you for reading!