
Building a wooden fence gate sounds like a weekend project. It is — but only if you plan it correctly. I built mine in a Saturday afternoon using pressure-treated pine, two 3.5-inch exterior strap hinges from Home Depot, and a simple diagonal brace that keeps the gate from sagging. The whole thing cost about $65 in lumber and hardware. Three years later it still swings straight.
Here’s the full process, including the measurements and the mistake I made the first time that caused my first attempt to sag within a month.
Quick answer: A basic wooden fence gate is a box frame with a diagonal brace, face-planked on the front. Cut the lumber to size, assemble the frame with 3-inch deck screws and corner brackets, add the diagonal brace running from the bottom of the latch side to the top of the hinge side, attach face planks, hang on heavy-duty strap hinges, add a latch. Budget 4-6 hours for a first build. Materials: $50-90 depending on wood choice and gate width.
What Materials and Tools Do You Need to Build a Wooden Fence Gate?
Lumber: Pressure-treated pine is the standard for any outdoor gate — it resists rot and insects. Cedar costs more but is lighter, which matters for large gates. I used 2×4 PT pine for the frame and 1×6 PT pine for the face planks.
Hardware:
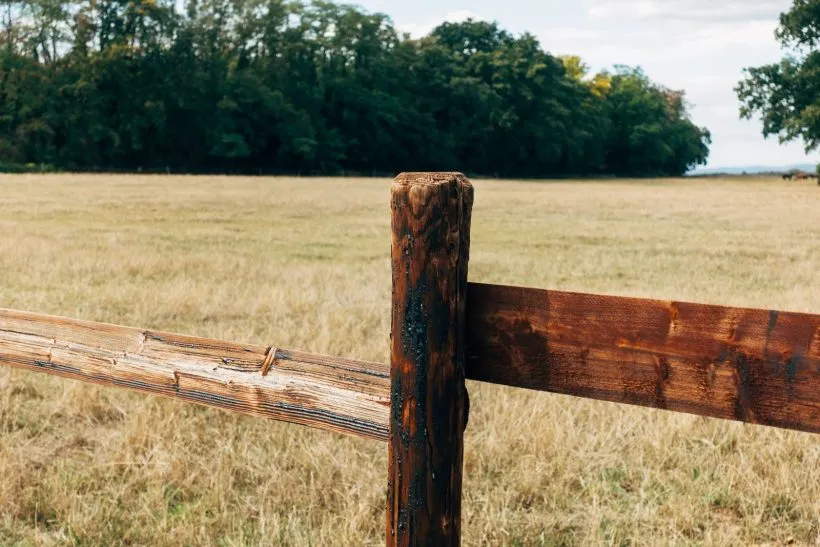
- Two heavy-duty strap hinges (3.5 inch or larger — don’t cheap out here, undersized hinges are how gates sag)
- Exterior deck screws, 3-inch (for frame) and 1.5-inch (for face planks)
- Four flat L-brackets or corner brackets for the frame corners
- A gate latch — gravity latches are the most reliable for wooden gates
- Optional: a tension spring to pull the gate closed automatically
Tools:
- Miter saw or circular saw
- Drill and bits
- Speed square
- Tape measure
- Level
- Clamps (at least two)
- Pencil
How Do You Measure for a Fence Gate?
Measure the opening between your fence posts. A gate should be 1/2 to 3/4 inch narrower than the opening on each side — so if the opening is 36 inches wide, build the gate 35 to 35.5 inches wide. This gives clearance for the gate to swing without binding, and allows for seasonal wood movement.
Gate height: match the fence height minus 1.5 to 2 inches from the ground (so the bottom doesn’t drag).
Write these numbers down. The gate opening rarely matches a standard lumber size — you’ll almost always be ripping or trimming.
How to Build the Gate Frame
The frame is a rectangle of 2×4 lumber: two vertical pieces (stiles) and two horizontal pieces (rails) — top rail and bottom rail. The finished outer dimensions of this frame should match your gate width and height.
Step 1: Cut your frame pieces. Cut the two stiles to the full gate height. Cut the two rails to the gate width minus the thickness of both stiles (each 2×4 actual thickness is 1.5 inches, so subtract 3 inches total from the gate width).
Step 2: Assemble the rectangle. Lay everything flat on your driveway or garage floor — a flat surface is critical. Pre-drill the corners to prevent splitting, then drive two 3-inch screws through the stile into each end of the rail. Add corner brackets on the inside of each corner for extra rigidity.
Step 3: Check for square. Measure diagonally corner to corner both ways. The two measurements must match. If they don’t, clamp a bar across the longer diagonal and apply light pressure until the measurements equalize. This is the step most people rush, and it’s why gates end up out of square.
Why Does a Fence Gate Need a Diagonal Brace?
A rectangular wooden frame will sag over time — gravity pulls the latch-side corner down. The fix is a diagonal brace running from the bottom hinge corner to the top latch corner (not the other way). This pushes compression load toward the hinges, which are your structural support.
Step 4: Cut and install the diagonal brace. Measure diagonally across the inside of the frame from bottom-hinge corner to top-latch corner. Cut a 2×4 to this length, angling the ends to fit flush. Secure with 3-inch screws into each rail. The brace should sit flat on the same plane as the frame — don’t let it stick forward.
This is the step I skipped on my first attempt. I thought the face planks would hold everything rigid. They don’t. The gate was sagging within six weeks. Added the diagonal brace and it hasn’t moved since.
How to Attach the Face Planks

Face planks cover the front of the frame. I used 1×6 PT pine boards, which match my fence boards for a consistent look.
Step 5: Start from one edge and work across. Leave a small gap (about 1/8 inch) between boards — this prevents binding as the wood expands in wet weather. Use 1.5-inch exterior screws to attach each board at every rail and mid-rail location where it crosses the brace. Pre-drill to prevent splitting at board edges.
Tip: use a 16-penny nail as a spacer — just drop it between boards as you work across. Gives consistent 1/8-inch gaps without measuring every time.
Step 6: Trim the top if needed. If your fence has an angled top or pickets that follow a curve, mark the cut line on the attached boards and trim with a circular saw. Much easier to trim after the boards are on than trying to cut each one perfectly in advance.
How to Hang a Wooden Fence Gate
Step 7: Position the gate in the opening. Use paint stirrers, shims, or small blocks under the gate to hold it at the correct height while you mount the hinges. The gate needs to be supported at the right clearance from the ground and centered in the opening.
Clamp the gate to the fence post temporarily to free up both hands for the hinge work.
Step 8: Mount the hinges. Attach the hinge leaf to the gate first (it’s easier to position while the gate is stable), then swing the gate open and attach the other leaf to the fence post. Use all the screw holes — hinge screws carry real load. If the post is 4×4 lumber, use 3-inch lag screws instead of the short screws that come with budget hinges.
Step 9: Check the swing. Remove the shims and swing the gate. It should open smoothly without dragging and close without binding. If the latch side drops slightly, your diagonal brace needs to run from the bottom hinge corner — check step 4.
How to Add the Latch and Seal the Wood
Step 10: Install the latch. A gravity latch is the simplest and most reliable. Mark the latch position on the post with the gate closed, then mount the latch per the manufacturer’s instructions. Test the gate at least 10 times before declaring the latch done — a poorly positioned latch is the most common gate complaint a year after building.
Step 11: Seal or paint the wood. Pressure-treated pine is rot-resistant but not impervious. Apply an exterior wood sealer or stain within the first few weeks. Pay extra attention to the end grain at the top and bottom of all boards — end grain absorbs moisture fastest and is where rot starts.
For long-term maintenance, re-seal every 2-3 years. The bottom rail is the piece to watch — if it shows signs of soft spots, replace it before the rot spreads to the face boards.
For other garden perimeter projects, the garden maintenance guide covers drainage and fencing considerations that affect how long a wooden gate holds up.
What I’d Do Differently
I’d use cedar instead of pressure-treated pine. PT pine is fine and cheap, but it’s heavier, which adds stress to the hinges over time. Cedar is naturally rot-resistant, lighter, and takes stain more evenly. The premium is real — cedar fence boards cost about twice as much — but for a gate that’s opened and closed 10 times a day, the weight reduction is worth it.
I’d also use 3.5-inch hinges minimum, even for a lightweight gate. The $4 hinges that come in gate hardware kits are undersized for real-world use. Go to the hinge display at a hardware store and buy the heaviest-duty ones rated for your gate’s estimated weight.
FAQ: Building a Wooden Fence Gate
How much does it cost to build a wooden fence gate?
A standard 36-inch wide gate in pressure-treated pine runs $50-90 in materials: roughly $25-35 for lumber, $15-25 for hardware (hinges, latch, screws, brackets), and $10-15 for sealer. Cedar increases the lumber cost to $45-60. Add a spring closure mechanism for another $8-12.
What wood is best for a fence gate?
Pressure-treated pine is the standard budget choice — durable and widely available. Cedar is the premium option: lighter, naturally rot-resistant, and it takes stain beautifully. Redwood is excellent but expensive and regionally limited. Avoid untreated pine or whitewood outdoors — they’ll rot within a few years.
Why is my wooden fence gate sagging?
A gate without a diagonal brace sags because the rectangular frame has no resistance to the downward pull of gravity on the latch side. The fix is a 2×4 diagonal brace running from the bottom hinge corner to the top latch corner. Don’t run it the other way — that brace direction doesn’t resist sag, it causes it.
What size hinges do I need for a wooden gate?
For a standard 36-inch gate made of 1×6 pine boards and 2×4 frame (total weight 30-40 lbs), use strap hinges rated for at least 75 lbs per pair. The rating is usually printed on the package. For heavier gates (cedar, wide gates, or gates over 5 feet tall), step up to heavy-duty strap hinges rated 150+ lbs.
How do I keep my wooden fence gate from rotting?
The most vulnerable spots are the end grain at the top and bottom of boards, the bottom rail, and anywhere water pools or stays wet. Seal or paint all surfaces before assembly, re-seal every 2-3 years, and keep the bottom of the gate at least 1.5 inches off the ground. Adding a gravel or concrete pad under the gate opening prevents ground contact that draws moisture up into the wood.
For ideas on the surrounding landscape, the essential gardening tools guide covers what you need once the gate is up and you’re working on what’s inside it.
Updated June 2026 | By john
Thank you for reading!