Are you shopping for toolbox basics? Want to know about the claw hammer basics? This article will enlighten you. Out of the 40 different hammers available in the retail, the claw hammer is people’s favorite. You know why? It is skillful and able to perform jobs, including but not limited to occasional home repair.
First, what tool is a claw hammer? Claw hammer is one of the common and essential tools in every household. Like any basic hammer, they design the claw hammer to pound nails into the wood or other similar surfaces. They can also pull out nails, unlike basic hammers. Usually, they weigh around 7-32 oz.
What does it look like?
With a long handle and a short head, the Claw hammer resembles the alphabet ‘T.’ As the name suggests, one end of the hammer’s head looks like a claw. The other end of the head is round with a textured or flat surface.
Needless to say, the claw end is used to pull out nails. Upon close observation, you can notice the claw-shaped part split from the middle, forming a ‘V’ shape. Further, the claw side curves down to catch the nails, using the ‘V’ shaped face, while extracting.
What are the parts of the claw hammer?
As we all know, the design of the claw hammer looks simple; with a head, handle, and claw as major parts. However, the head part is further divided into four different parts. Let us have a brief look at the parts.
Handle
The handle or the shaft is the first and most important part of the hammer. The accuracy of the work depends on the handle’s length, and usually, they are 13″ long. The handle is strong enough to give adequate grip required when driving nails or staking tents using a hammerhead.
Head
Commonly known as an anvil, the head is the second most essential part of the hammer. The Head part is usually designed in two different weights.
The lighter ones are suitable for getting precise work done whereas; the heavy head is suitable for easy working. Mostly, the head part weighs between 8 oz -16 oz. As mentioned already, the head is further divided into four other parts whose names resemble the parts of the human head.
- Face- The face is the part of the hammerhead, which does the most work. The diameter of the face is smaller for a lightweight hammer and wider for a heavy-duty hammer. However, the range falling between the two is the best diameter to get the jobs done quickly and easily.
- Cheek- The cheek is flat and is on one of the sides of the eye. It helps in; holding the head and handle together and in bearing the stress.
- Eye- The eye part is below the hammer’s head. It is nothing but a tiny hole into which it fits the shaft. Usually, they are found in hammers with wooden and rubber handles and not in steel handles.
- Neck- It is located between the face and the head part of the hammer. The neck part is beneficial in providing a balance to the hammer, apart from connecting the head and handle part.
Claw
The third most important part of the hammer is the claw. The claw, as already mentioned, curves down with a split in the center. It is useful for holding nail heads while pulling them or ripping wood and other materials.

What are the materials used to make a Claw hammer?
For durability, the head of the claw hammer comprises high carbon steel, obtained from the heat hardening process. Also, you can find hammerheads made of lightweight yet powerful titanium.
Coming to the shafts, they are traditionally manufactured using Hickory or Ashwood. Recently, the shafts are also made using steel, fiberglass, or titanium.
Further, you can also find one-piece claw hammers comprising the same material for the head and shaft. Mostly, this type of hammers is made using high-grade steel or titanium.
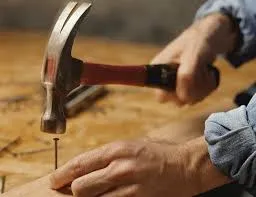
How does a claw hammer function?
The most common function of a claw hammer is to pound or pull out nails, into or from any surface, respectively. This versatile hammer is more functional in woodworking, prying, and finishing, but they are not for heavy surfaces like metal.
What are the types of claw hammers?
Usually, the claw hammers have a unique head part with a face and claw on opposite sides. They come in two different claw shapes, namely, the conventional claw and the rip style claw. They differ, as the conventional claw looks curvier while the ripped style is flatter than the previous.
Based on that, the claw hammers are commonly classified into two different types as follows:
Finishing hammer
Head weighing between 5-16 inches and the shaft measuring between 12- 14 long, it is commonly used in households. Though you can get most of your works done precisely, it is not suitable for heavy-duty works.
Framing hammer
Head weighing between 15-24 oz and the shaft measuring 15-20 inches long; it is used by builders, usually for heavy works. The framing hammer has a rip style claw, making it easier to rip off heavy wood surfaces.
How to care for your claw hammer?
Irrespective of the hand tool you own, it is necessary to maintain it properly after every use, to last. Similarly, a claw hammer, if taken care of properly, tends to last a lifetime. All you have to do is clean the dirt from the hammer after every use and store it in the toolbox. If required, you can use a rust dissolver for wiping the metal surfaces of the hammer and store it in a toolbox until next use.

Final words
Awesome things get done only with the proper tools. Every household should have a toolbox with a hammer to do repairs or try DIY projects on your own.
If you don’t own it yet, consider purchasing one from the local stores or online markets today! The price starts from as low as $12 and goes up depending upon the material used for making the shaft and head. What are you waiting for? Purchase yours today!
Bonus video: Hammer Basics and Tips | Mitre 10 Easy As DIY
Thank you for reading!