A great finished basement feels like the rest of your home — quiet, dry, warm, and easy to live in. The projects that get there reliably follow a few principles: control moisture first, respect building code (especially egress and electrical), design for real life (storage, sound, lighting), and sequence the work so trades aren’t stepping on each other. This Smart Guide lays out a clean path you can follow, whether you’re carving out a family room, home office, or guest suite.
If you’re near Terre Haute, Indiana, local soil, drainage, and freeze–thaw cycles make moisture management and insulation choices especially important. The steps below reflect those conditions without overcomplicating the build.
Start With Feasibility: Moisture, Radon, and Headroom
Before you sketch a layout, confirm the basement can stay dry and healthy. Look for past water lines, damp corners, and efflorescence. Test for radon, clean gutters, extend downspouts, grade soil away from the foundation, and make sure sump pumps and drain tiles actually move water. Document ceiling height, duct/beam locations, and any posts that affect room flow. Solve moisture at the source now; finishes won’t fix wet walls later.
Code & Safety Essentials You Can’t Skip
Basements trigger a few non-negotiables: proper stair geometry, smoke/CO alarms, arc-fault/GFCI protection where required, and bedroom egress (or alternative rescue openings) that meet clear-opening and sill-height rules. Permits and inspections protect you and future buyers, plan for footing/foundation (if applicable), framing, rough-ins, insulation, and final.
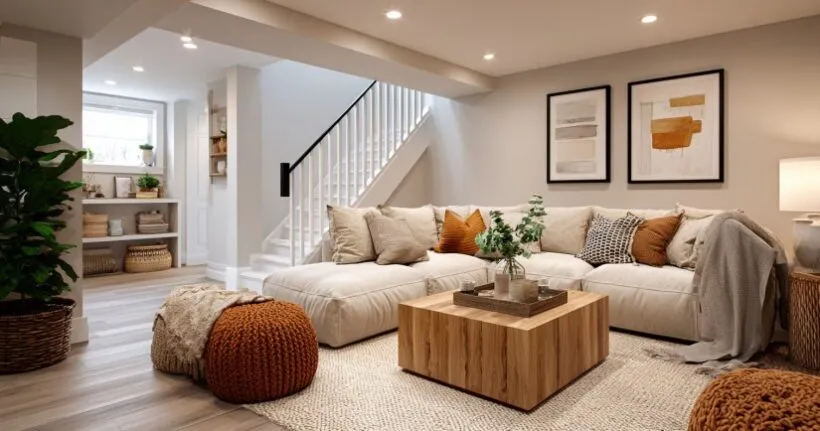
Plan the Space You’ll Actually Use
Zones beat random rooms. Think in clusters: media + snack zone; office + storage; play area + easy-clean flooring. Keep plumbing fixtures near existing lines when possible. Put noisy equipment (mechanicals, laundry) behind insulated partitions and use solid doors with good weather-stripping.
Envelope First: How to Build Dry, Warm Walls
Basement walls are different from above-grade walls. Skip poly against concrete trap moisture, and you’ll grow mould. Aim for assemblies that can dry inward.
Four envelope moves that work
- Rigid or spray foam against foundation walls to reduce condensation risk
- Framed 2×4 wall with mineral wool or fibreglass inboard of foam for added R-value
- Air sealing at top/bottom plates, around penetrations, and rim joists
- Continuous thermal break at the slab edge where feasible
Floors That Stay Flat and Comfortable
Concrete is unforgiving and often wavy. If you’re adding resilient flooring, consider a subfloor panel system or foam/ply sandwich to warm the surface and buffer minor irregularities. Keep carpet to limited areas, and use moisture-tolerant pads and backings.
Six basement-friendly flooring options
- Luxury vinyl plank/tiles (water-tolerant, easy-to-replace pieces)
- Rubber sport tiles for gyms and play areas
- Engineered wood rated for below-grade installs
- Ceramic/porcelain tile in bath or entry zones
- Stain-sealed concrete for utility or storage spaces
- Carpet tiles (select areas only) for warmth with easy swap-outs
Mechanical Systems: Quiet, Balanced, and Fresh
Extend supply/return ducts thoughtfully so rooms aren’t stuffy. Seal seams, balance airflow, and plan return paths from closed rooms. Size bath fans correctly and terminate outdoors with insulated ducts. If humidity trends high seasonally, rough-in a dedicated dehumidifier drain and outlet so you’re not emptying buckets.
Four MEP checks to put on your plan
- Right-sized, quiet bath fan with a timer or humidity control
- Balanced returns to bedrooms/offices so doors don’t stifle airflow
- Adequate circuits and dedicated outlets for media, office, or gym gear
- Dehumidifier stub (drain + receptacle) near the mechanical room
Lighting & Sound: Comfort You Feel Every Day
Basements need layered light to avoid cave vibes: ambient cans or low-glare panel lights, task lights at desks and counters, and accents at art or shelves. Keep colour temperature consistent. For sound, insulate interior walls around media rooms and add resilient channels or sound-damping drywall if you care about upstairs noise.
Four easy wins for light and sound
- 2700–3000K LEDs with high CRI for natural colour
- Dimmers and multi-circuit switching for scenes and energy savings
- Mineral wool in interior partitions to cut sound bleed
- Solid-core doors in media/office rooms for instant quiet
Bathrooms & Wet Areas: Build Them to Last
If you’re adding a bathroom, start with the layout and venting. Use surface-applied waterproofing for showers, slope pans and niches correctly, and seal curb/wall transitions. Vent fans outdoors and size for run length. For laundry niches, include a drain pan, shut-offs, and a leak alarm; you’ll thank yourself later.
Budgeting the Right Way
Per-square-foot numbers are only a map. Your spend depends on moisture fixes, bath/kitchen additions, custom cabinetry, and how much sound/thermal performance you want. Lock selections before framing, give each allowance a realistic number, and build a 10% contingency for surprises like a cracked waste line or hidden rot at the rim.
Six cost levers you control
- Keep plumbing near stacks to reduce concrete cuts
- Use prefinished trims and stable, paint-ready materials
- Choose resilient flooring over site-finished hardwood
- Prefab shower bases or solid-surface panels where tile isn’t essential
- Stock cabinets with smart inserts instead of full custom runs
- Simple ceiling plans that route around beams/ducts without huge soffits
A Clean, Predictable Timeline
Most projects run: feasibility and permits; framing; MEP rough-ins; inspections; insulation/air sealing; drywall; finishes; punch; final inspection. Weather is less of a factor below-grade, but material lead times still matter. Keep inspections grouped and tidy, fast passes keep subs moving.
Eight common pitfalls to avoid
- Skipping exterior water management (gutters, grading, downspouts)
- Poly against concrete walls trapping moisture
- Venting bath or dryer into the joist bay or attic
- No egress plan for sleeping rooms
- Forgetting return air paths for closed rooms
- Undersizing electrical and data for a true media/office space
- Inconsistent lighting colour temperatures from room to room
- No dehumidification plan for summer peaks

Closeout, Maintenance, and Future-Proofing
Before final payment, test GFCI/AFCI, run the bath fan and verify exterior termination, check water temperature at fixtures, and photograph insulation depths, flashing, and any concealed valves for your records. Keep a maintenance list—clean fan grilles, replace filters, re-seal grout so the space looks new for longer. This Smart Guide also reminds you: if you might add a kitchenette later, cap plumbing stubs and leave space in the panel now to avoid opening finished walls down the road.
For homeowners in and around Terre Haute, a dry-first approach paired with careful mechanicals and sensible finishes yields basements that feel like true living space, not storage you wrapped in drywall. Patriot Property Pros emphasizes those fundamentals on every basement remodeling and finishing so the newly finished square footage stays quiet, clean, and comfortable through summer humidity and winter cold.
Thank you for reading!